Live streaming is a fantastic way to broadcast content while interacting with your audience all around the world in real-time.
However, what if you need to live stream to only a select few? Whether for a meeting, a paid special event, or you just want to present a little skit for your friends to enjoy, you can easily live stream privately on YouTube.
How to Private Live Stream on YouTube
To start a private live stream, you will first need to have a YouTube account. You can’t live stream, either publicly or privately, if you don’t have a channel on YouTube. If you don’t have a YouTube channel yet, check out this article for our full guide on how to set up one.
-
step 1
Go to YouTube and log in to your account, if you haven’t done so already.
-
step 2
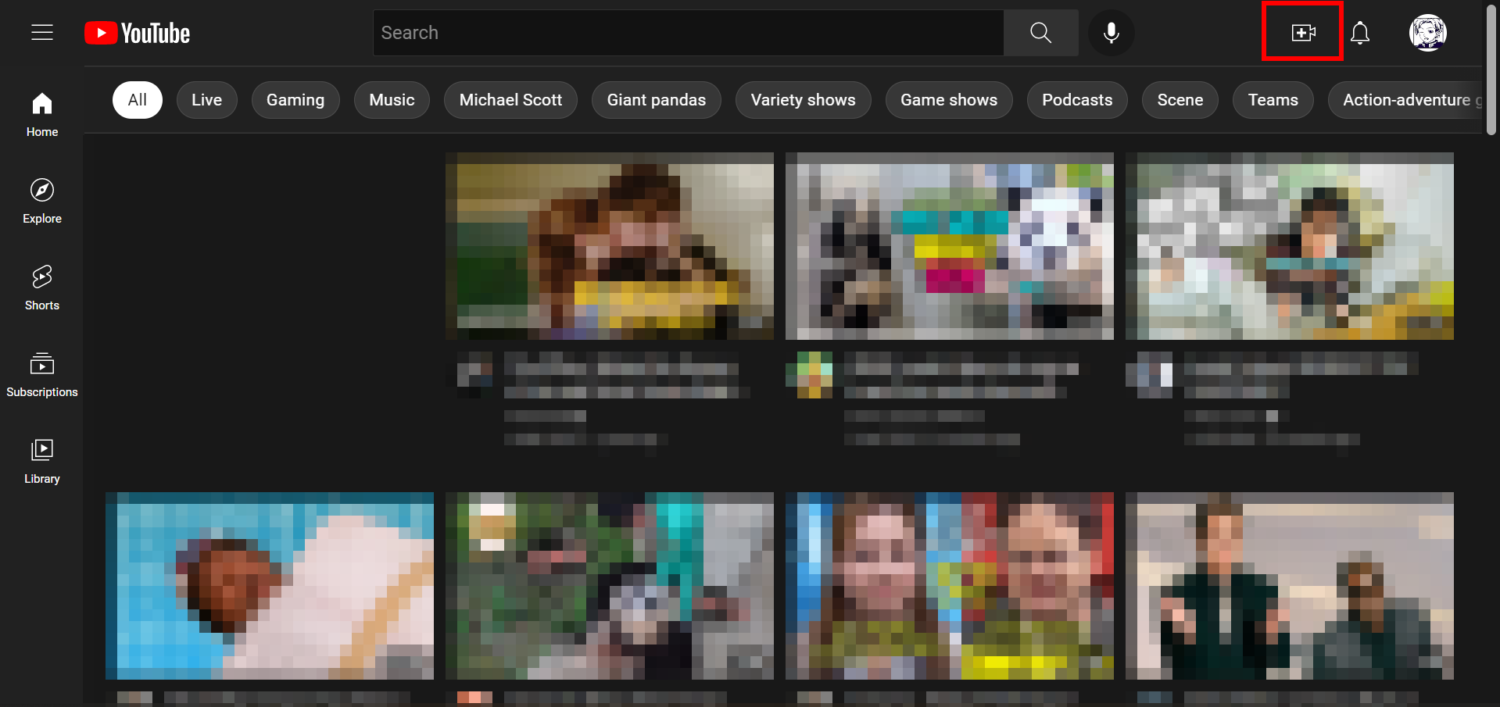
Click the “Create” button (the one with the video recorder icon) at the top of the YouTube page.
-
step 3
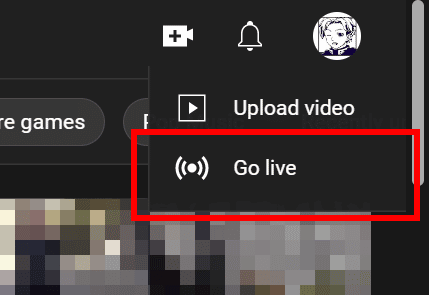
On the context menu, choose “Go Live”.
-
step 4
Now, you will be redirected to YouTube LIVE Control Room.
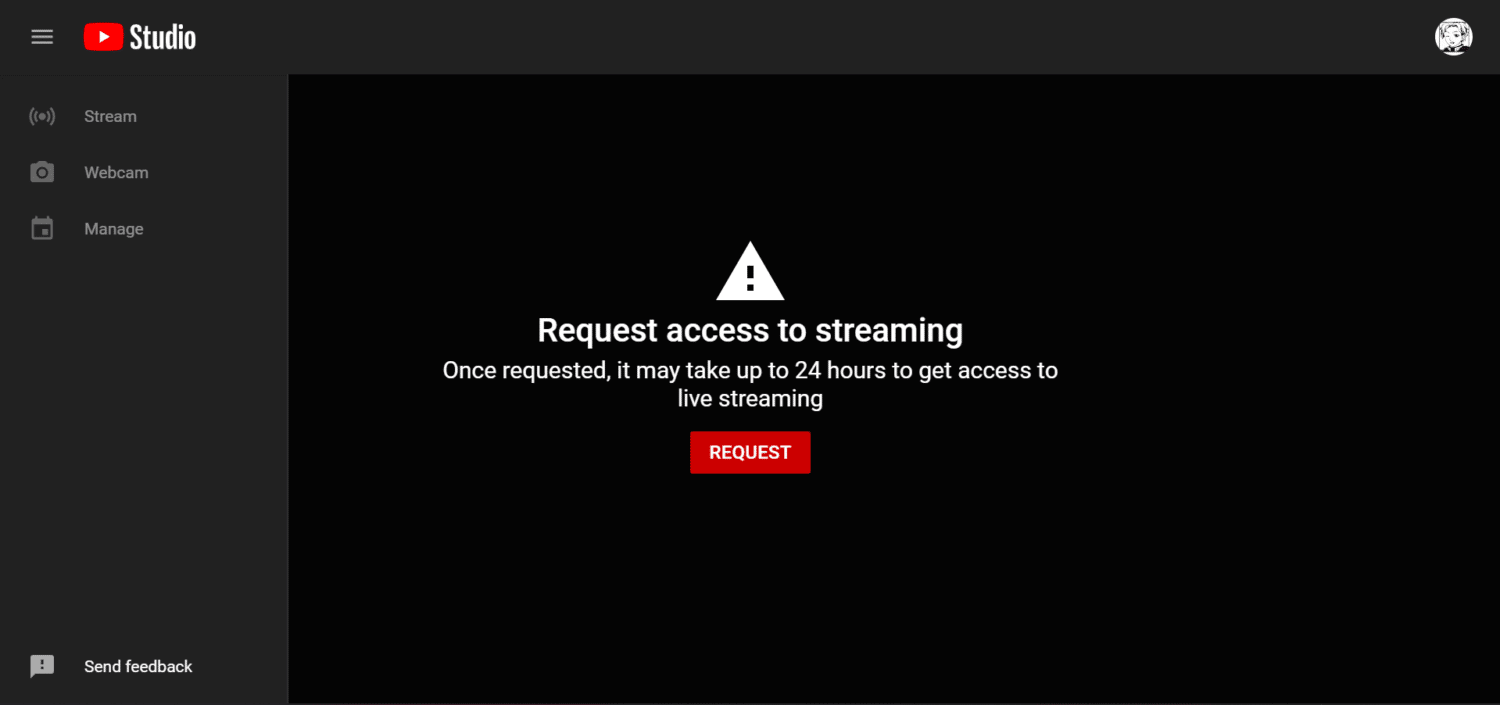
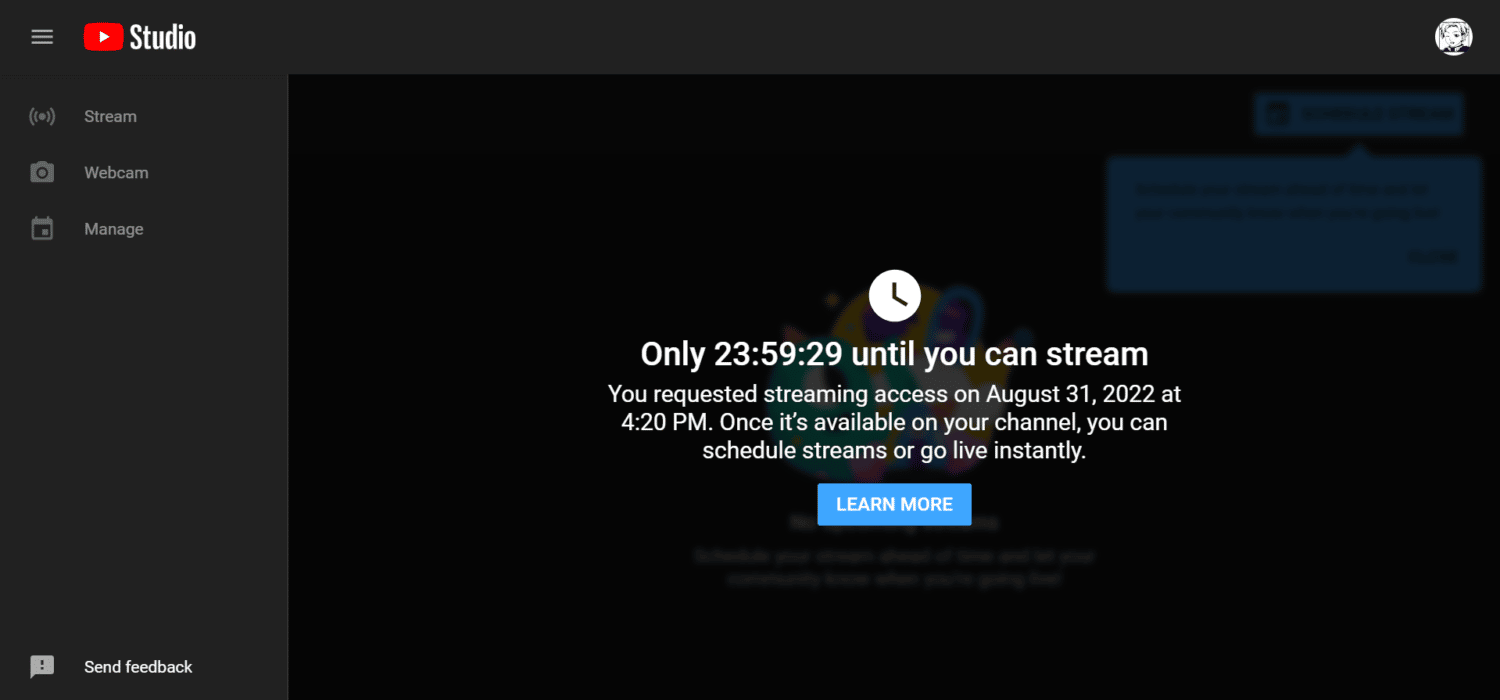
Note: If this is your channel’s first live stream, you may encounter this page instead:
In this case, you will need to request YouTube to enable your live stream abilities. Since this is a whole other process, please check out the short guide below on how to enable live streaming on your channel.
Once you get approved after 24 hours, you can now live stream.
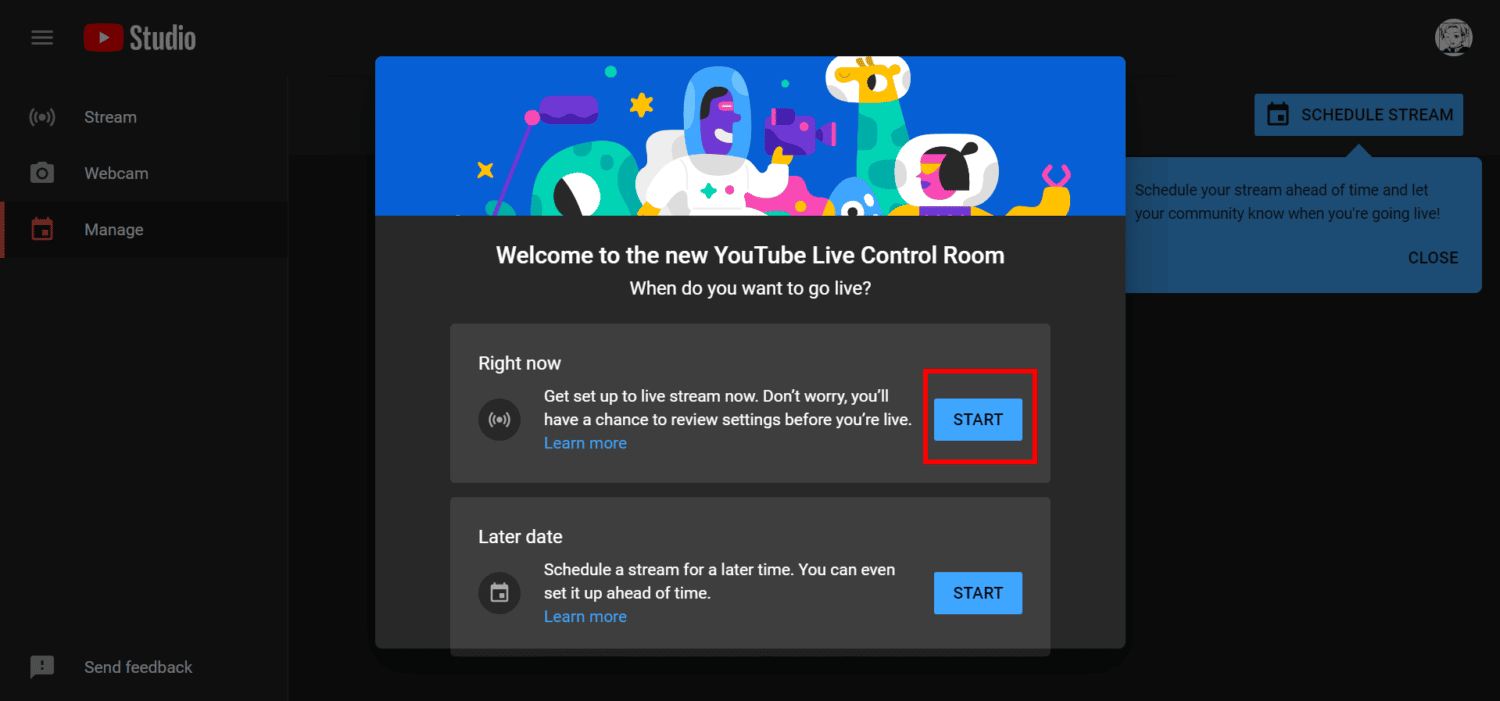
First off, you will be asked to choose if you want to stream right now or schedule it for a later date. Depending on your purpose for the private live stream, one option may be more suitable for you than the other.
For this guide, let’s choose the “Right now” option.
Click “Start.”
-
step 5
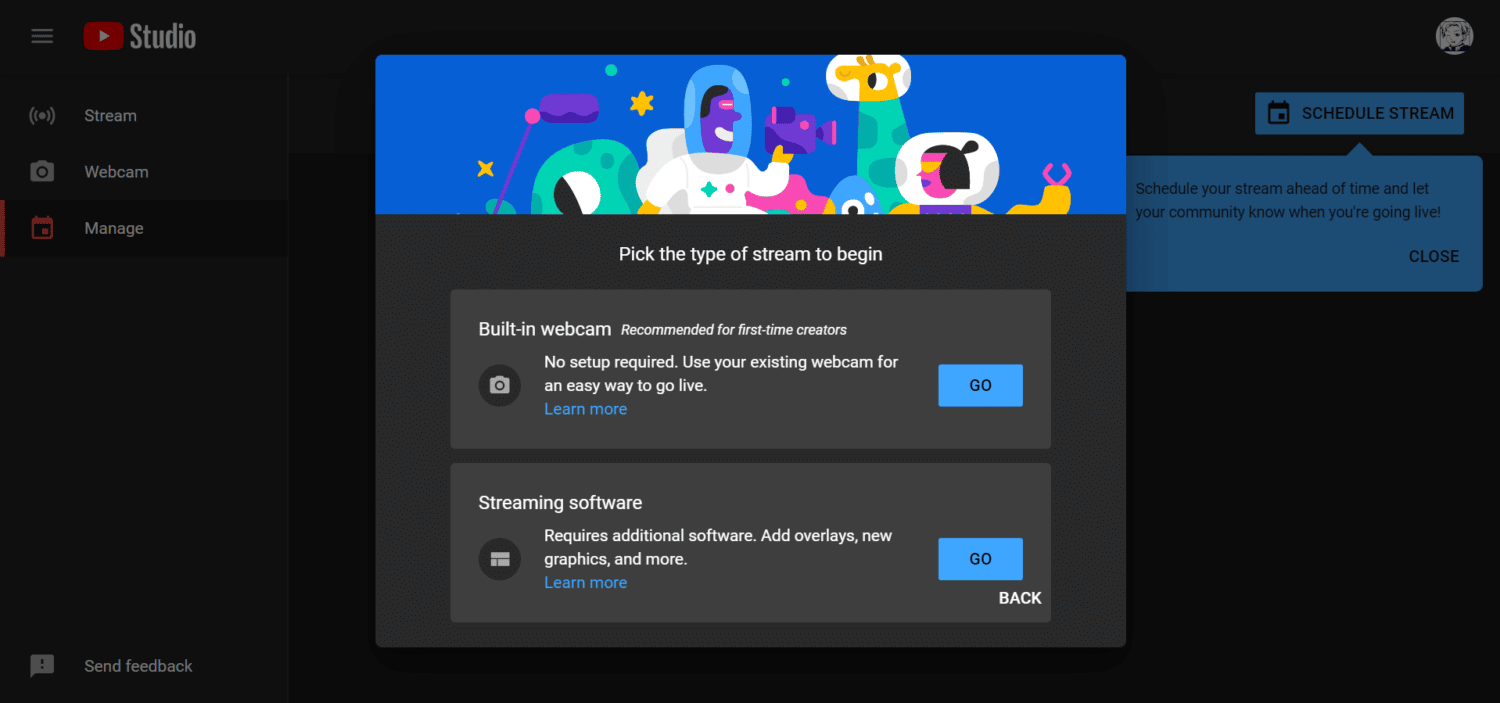
This time, you will be asked to select what type of stream you would like to start.
First, there’s the built-in webcam. As you would’ve guessed, YouTube will use your existing camera to record the live video. It’s the easiest method for anyone, but remember that you are going to turn on your camera for this.
The second is through the use of streaming software. Streaming software such as OBS, Streamlabs, and XSplit are basically encoding programs used to convert video input into a broadcast. This choice is ideal for gamers, presenters, and live events that need special effects such as filters.
However, it requires additional steps, such as installing the needed software and connecting it to your YouTube account. Therefore, it might take you quite some time before you can begin.
If that’s what you’re going for, there’s a fantastic in-depth guide you can check out here which explains how to live stream on YouTube. It’s made for those in the gaming niche, but it has complete tutorials on how to fully set up your channel, from installing software to getting your ready before the LIVE.
For this tutorial, however, we’ll go with the first option to stream via your webcam.
-
step 6
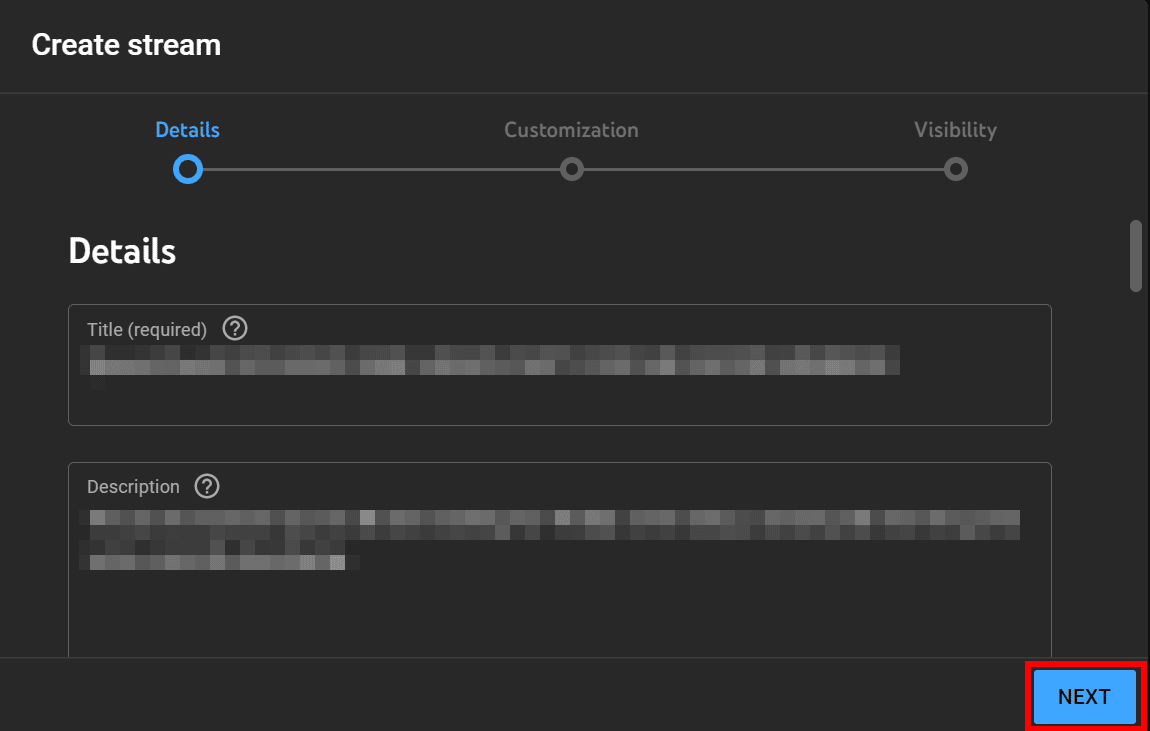
Add the necessary details for your private live stream, such as the title, description, and audience. After filling out all the important info, click “Next.”
-
step 7
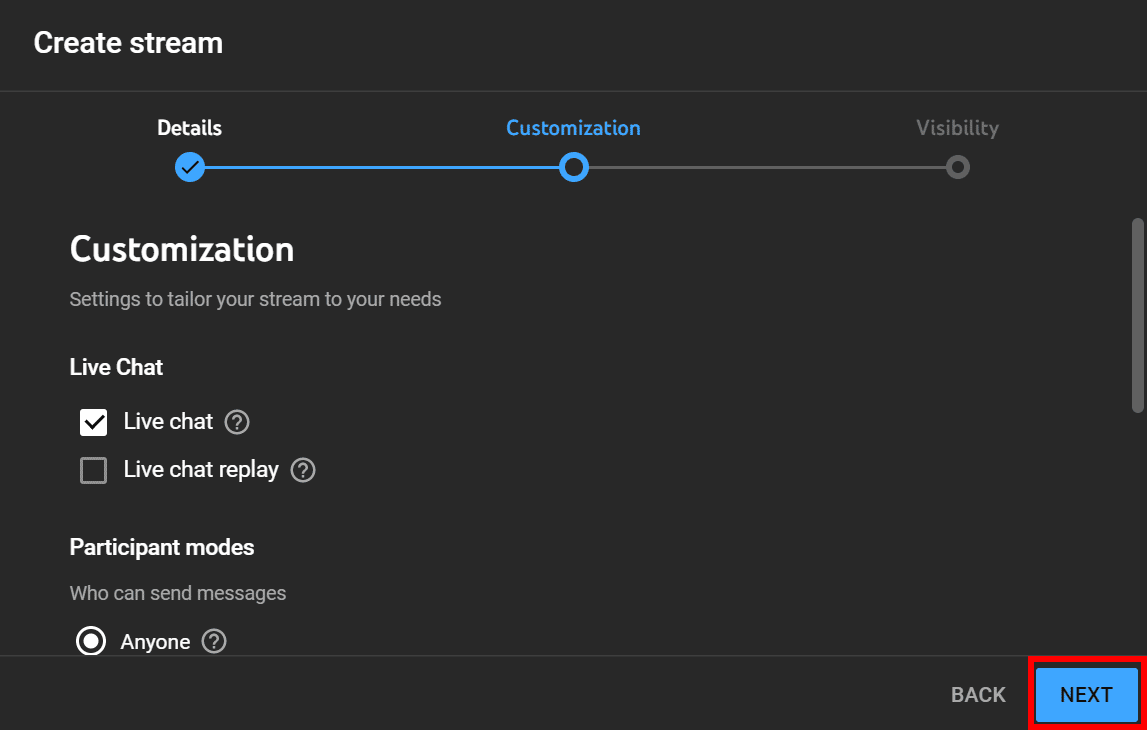
On the Customizations page, continue setting up more settings and preferences, such as whether you would want to enable LIVE Chat and LIVE Chat Replay or not. Then, click “Next.”
-
step 8
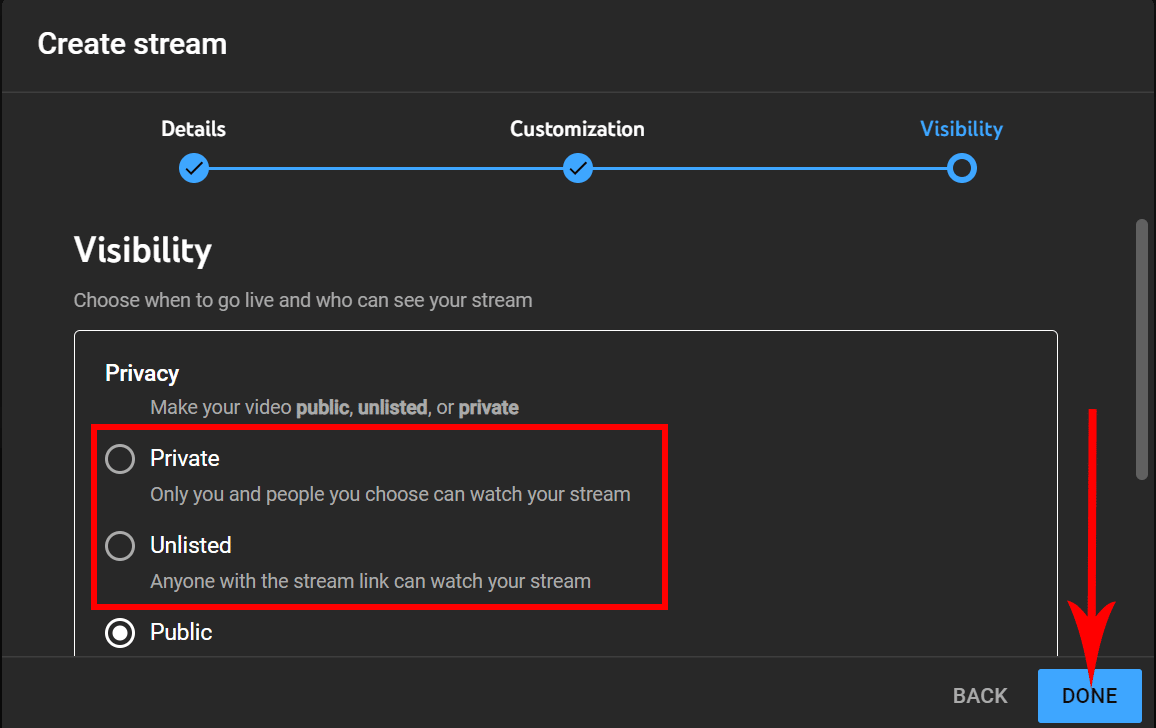
Now, in the Visibility options for your LIVE video, you need to specify who can watch your stream. Since you are going on a private live stream, it’s important not to set your video as public, or else uninvited users will be able to watch it.
You can either choose “Private” or “Unlisted”.
What’s the difference between those two?
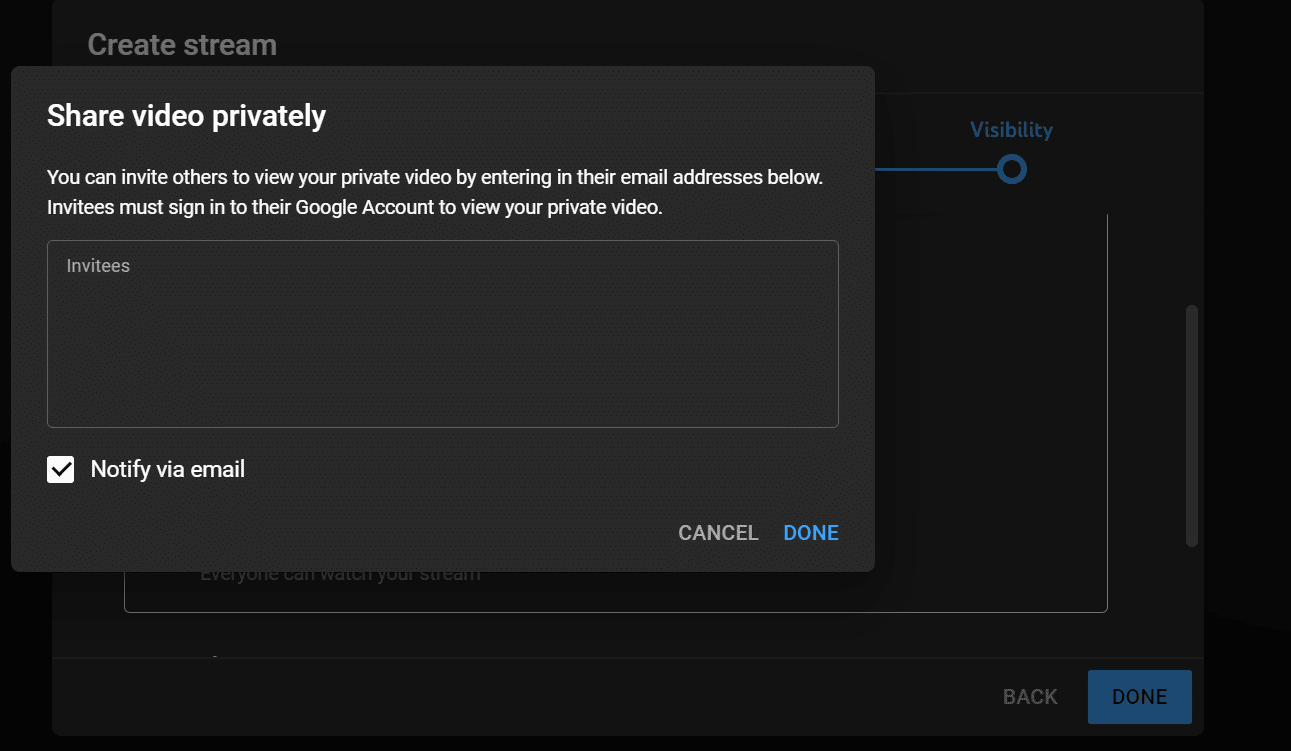
Private videos are viewable only by those to whom you sent an email invitation. You will need to enter their email addresses afterward to send them an invitation to watch the live stream. This is a great choice for private streams made exclusively for a certain group of people, like family members, friends, or employees.
Meanwhile, unlisted videos are only viewable by those who have the link to the stream. Whether you personally invited them or not, as long as they have the link, they will be able to watch your stream.
An unlisted live stream isn’t strictly private, but it won’t appear in the YouTube search results and won’t appear in your Videos tab.
In a way, it’s a happy medium between private and public.
You can use this if you want to private stream special events that can be easily accessed by anyone who has the link but can’t be viewed by the rest of YouTube.
After selecting your preferred audience and schedule, you can click “Done.”
-
step 9
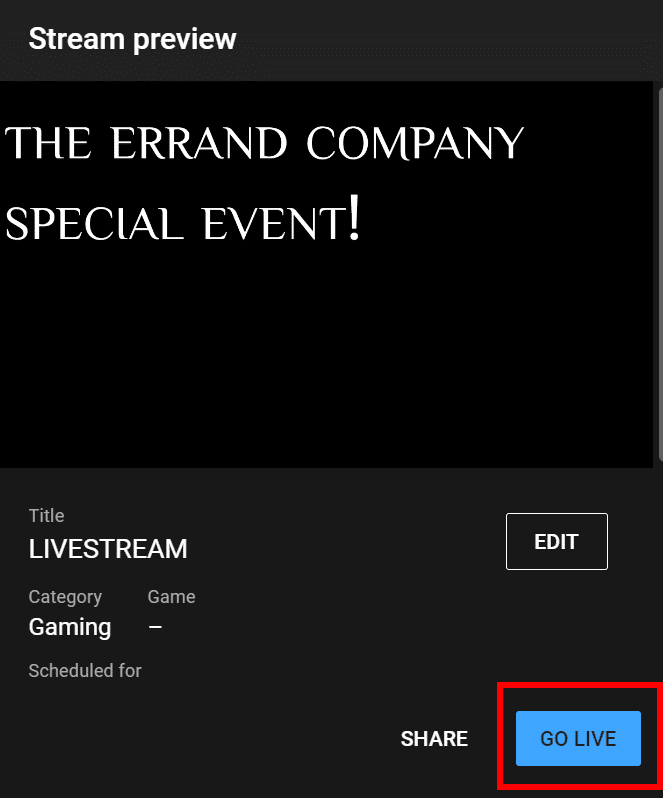
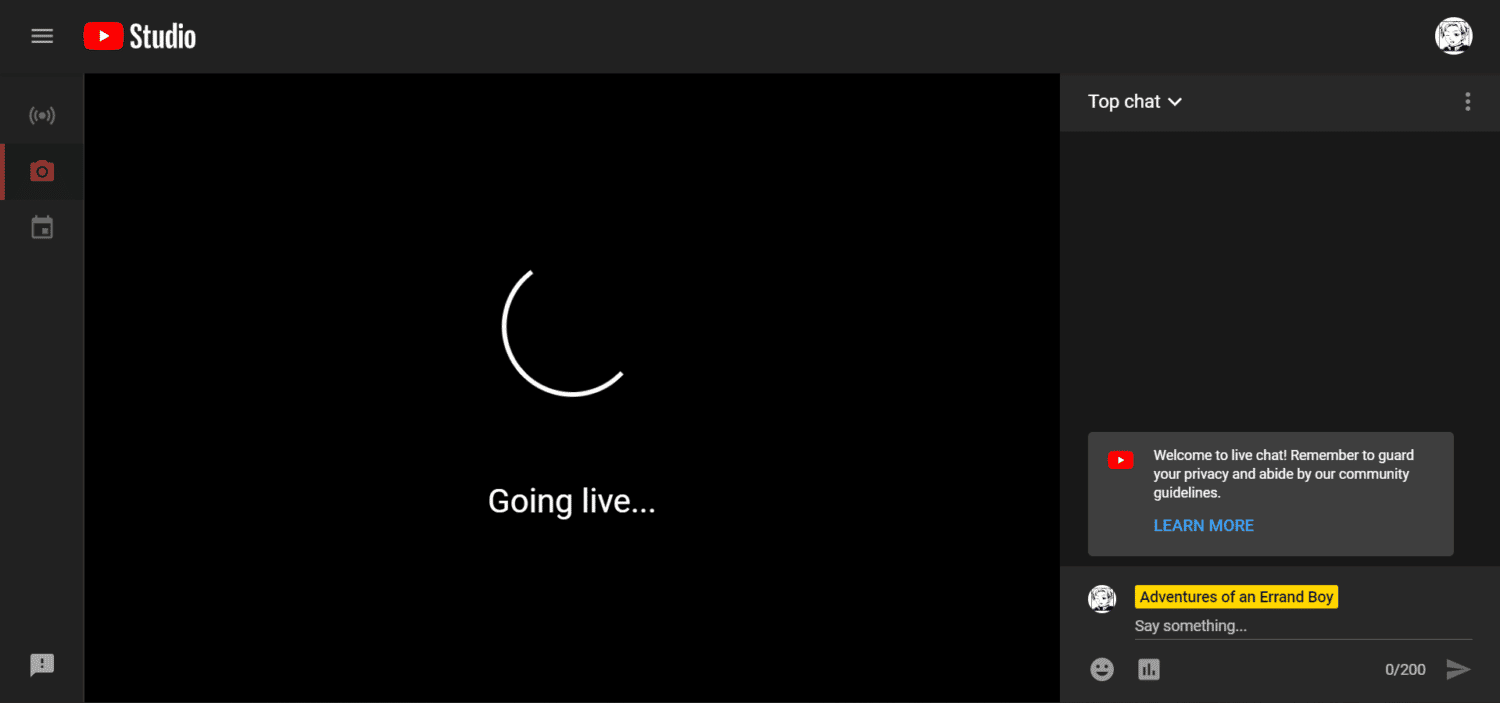
YouTube will show you a preview of your live stream. Check (and edit, if necessary) all the details before clicking the “Go Live” button.
You are now live!
Once your private live stream has started, you will see other options such as “Edit” and “End Stream” just below your video.
“Edit” takes you back to the stream settings (details, customization, visibility options) without stopping the private live stream. Meanwhile, “End Stream” stops the streaming immediately. Once your live stream is finished, click the “End Stream” button.
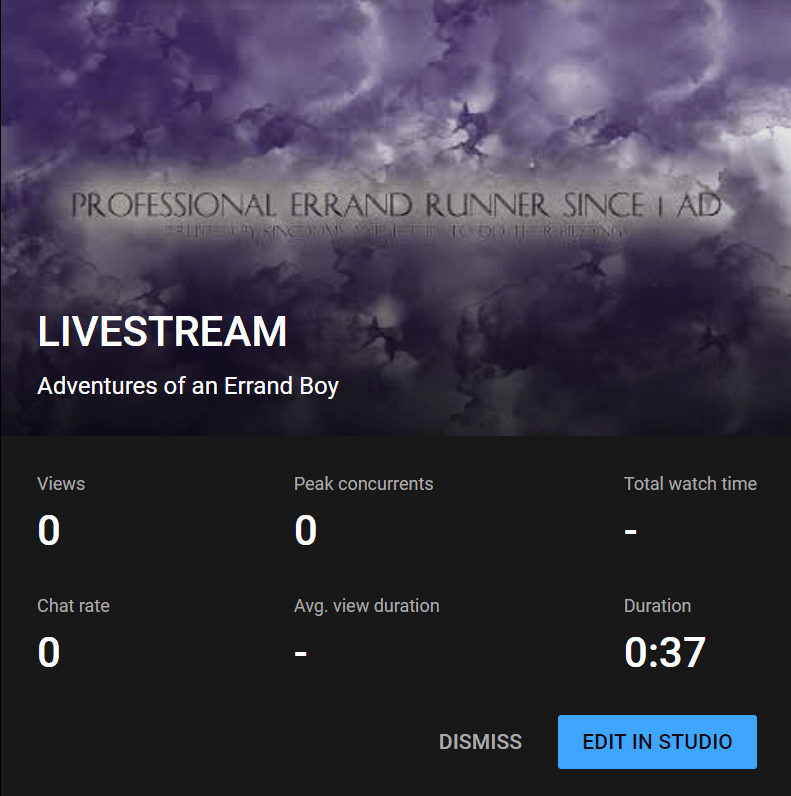
After your live stream, YouTube will ask you if you want to edit your video in the studio. Usually, this won’t be necessary, so click “Dismiss.” But if you prefer to edit it, you can still choose the other option, “Edit in Studio.”
That’s basically how to start a private live stream on YouTube.
Going Live Using A Streaming Software
If you’re streaming with the help of an encoder instead of your computer’s webcam, you can still change the visibility settings on the YouTube LIVE Control Room. Here’s how:
-
step 1
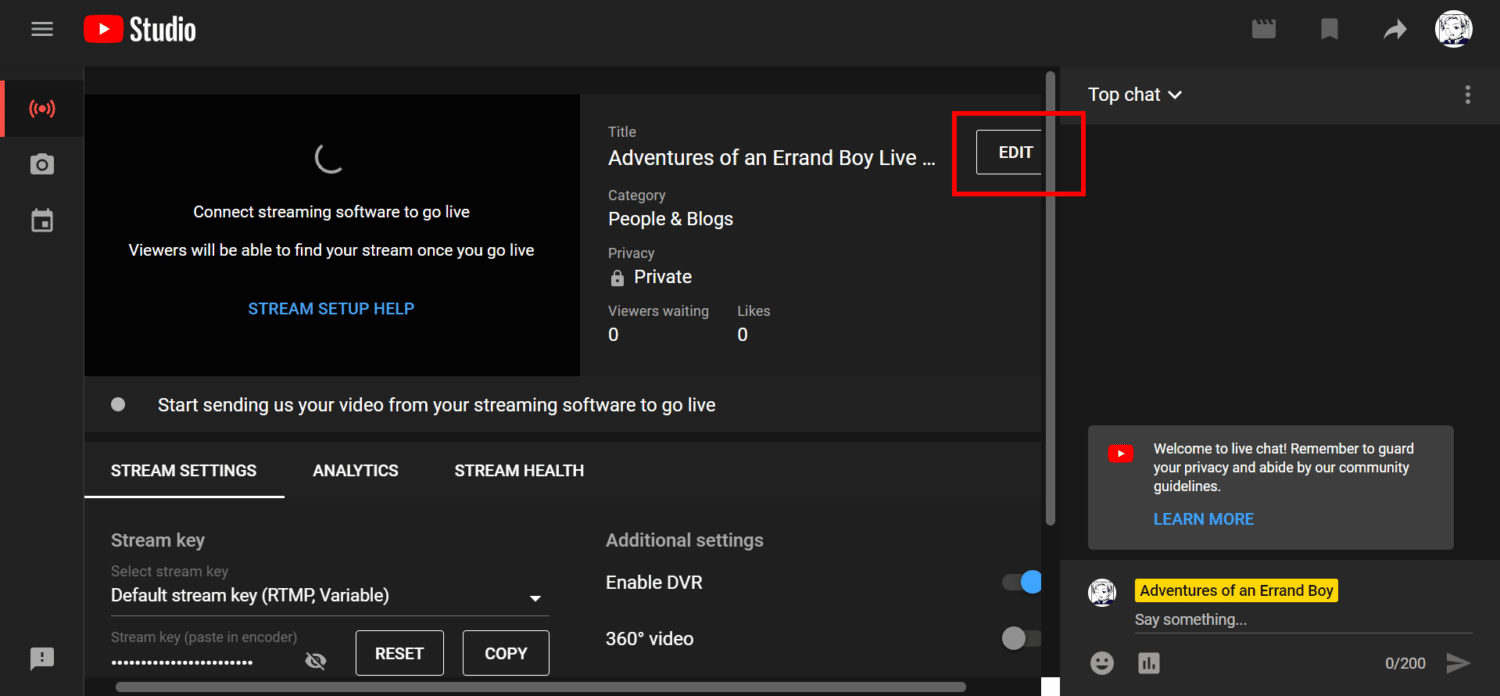
On the live streaming dashboard, find the “Edit” button and click it.
-
step 2
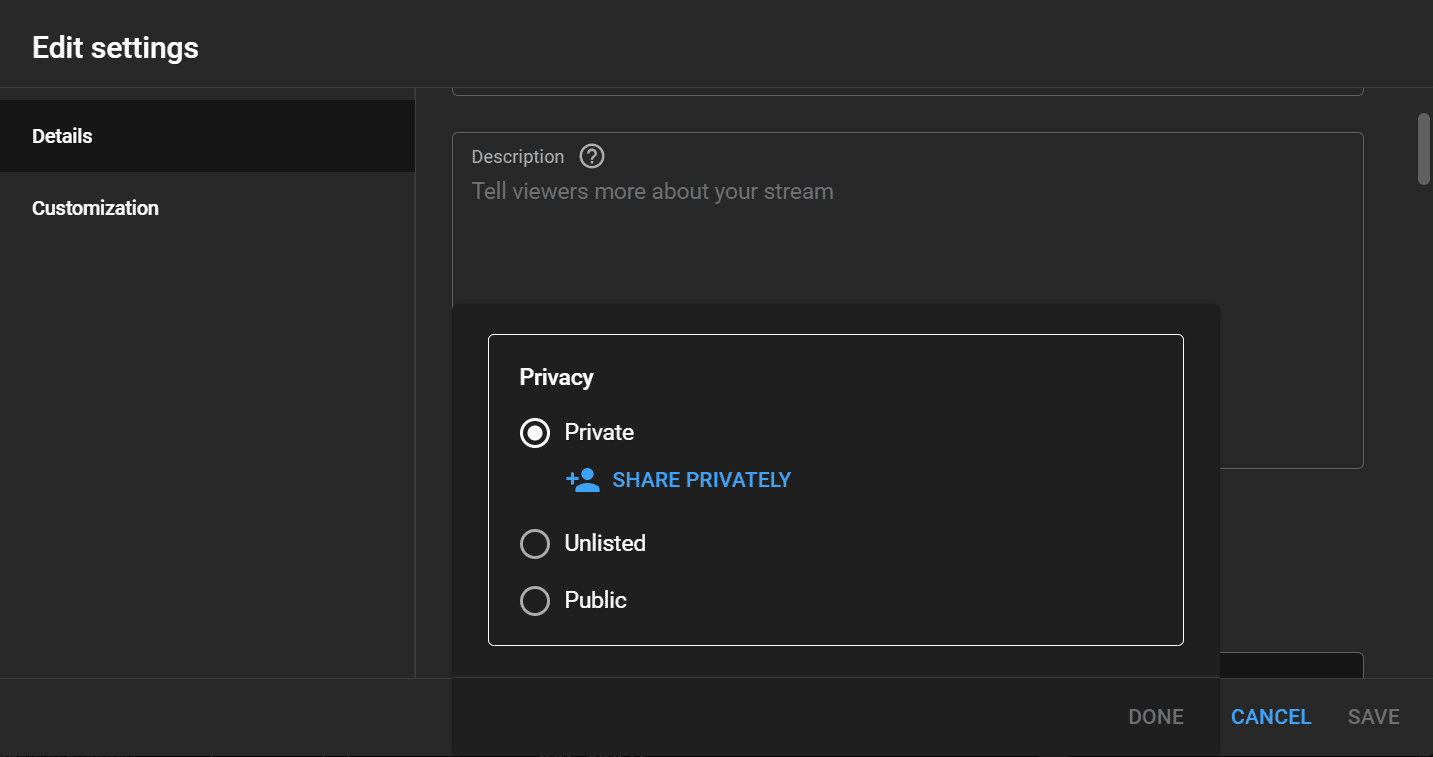
On the “Details” tab, scroll down for a bit until you find “Visibility.” Click it.
-
step 3
Choose either “Private” or “Unlisted.”
-
step 4
Don’t forget to save changes.
The LIVE Control Room is where you can change settings such as visibility, audience, and other important details you may have skipped over while setting up your stream. Here, you can also find information and preferences such as your live video’s stream health and the stream URL.

Requirements to Live Stream Privately on Your YouTube Channel
Before you can live stream on YouTube, there are some requirements you need to meet first. These are the following:
-
You must have a personal YouTube account
Of course, you will need to have your own YouTube account and channel before you can start live streaming. Setting up a new channel on YouTube only takes a couple of minutes. But if you already have a channel, then that’s one thing crossed out of your checklist.
-
Camera and microphone or an encoder software
Live streaming needs a camera and microphone or streaming software. Fortunately, most devices today have built-in webcams and microphones on them, so you won’t have to worry about that. Unless you want to have a higher quality output, of course, in which you will have to invest in better equipment.
On the other hand, if you want to stream games or add filters to your broadcast, you will have to install an encoder for this.
Here are some of the best ones:
- OBS
- Streamlabs
- XSplit
-
You need to verify your YouTube account
Having a channel is just step one to starting streaming on YouTube. You need to verify your account before you can proceed.
Normally, you will only need to provide your phone number for verification. If your channel is verified, you will enjoy more perks such as having the capability to stream and adding custom thumbnails to your videos.
-
Your channel must be in good standing
To live stream, your channel must not have any active Community Guidelines strike from YouTube. Furthermore, you mustn’t also have any live streaming restrictions imposed on you in the past 90 days.
-
You must request access from YouTube to start streaming
For those live streaming for the first time on their channel, you will likely get redirected to this page upon clicking the “Go LIVE” button:
Simply click the red “Request” button. Two things could happen:
- If your account is verified: You will just have to wait for YouTube to give you access to go live stream, which can take up to 24 hours.
- If your account isn’t verified: You will be redirected to a page where Google will ask for your active phone number. Enter your country and phone number, then wait for the verification code. Type the verification code and then click “Submit.” Once your account is verified, you will also have to wait for about 24 hours before you can start live streaming.
After that, you’re good to go! You can return to the previous section of this article on How to Private Live Stream on YouTubeto start going live.
-
Can you live stream on YouTube on mobile?
Yes, but live streaming on a mobile device has additional requirements. First, you need to have at least 50 subscribers before you can go live. If you’re using an Android device, it must be at least version 5.0.
Reason for Creating a Private Livestream
At a surface level, private live streaming seems to defeat the purpose of having a YouTube channel in the first place: to reach more audiences and grow your community. However, there are also many reasons live streaming privately is an excellent idea. Here are some of them:
-
Live streaming private events
Who says that you can’t live stream special events on YouTube? Host a live stream if there are weddings, anniversaries, birthdays, or parties to be held, but some of your guests can’t come in person. You can send them links through email to let them know, like a sort of virtual invitation.
-
Meetings, conferences, and seminars
While it’s true that apps like Zoom, Google Meet, and Microsoft Teams are the best options when it comes to hosting virtual meet-ups for offices and organizations, there’s a reason why YouTube should also be in your consideration.
A lot of people can view it at once–and by a lot, I mean hundreds, or even up to thousands. This is where unlisted live streams come into play. You can start a live stream and set it unlisted for larger seminars. Just distribute the link, and they can watch it comfortably from their apps or browsers.
Two, YouTube is easily accessible. You don’t need to download a separate app or software to have it going. There’s also a LIVE chat that your viewers can use to ask questions, but it has limitations such as the inability to talk via audio.
Still, it can be a good alternative, considering how easy it is to set up.
-
Exclusive content
Private or unlisted live streams can be an excellent tool for content creators and influencers. These types of live streams can be a good idea for exclusive events such as virtual concerts, tournaments, or interviews.
