

Twitter is one of the most important social networks around, and keeping up with the quick dynamic of the platform can be overwhelming when you have a big profile or even multiple accounts to keep track of.
Luckily, TweetDeck has you covered. This safe and easy tool helps you save time managing your Twitter accounts and make the most out of Twitter. The best part is that you don’t need any complicated software and it won’t cost you anything! In this article, you’ll be learning all about TweetDeck and how to use it, from the most basic features to advanced tricks that can totally change your game on Twitter.

What is TweetDeck?
TweetDeck is a dashboard tool developed by Twitter itself, that allows you to monitor and customize every aspect of your Twitter presence. The application features advanced tools like managing multiple accounts, sharing accounts with a team, monitoring users, hashtags and so many more we’ll be looking into.
TweetDeck is one of the most complete tools available for social media management and it’s a must-have for dedicated users, influencers, and brands that use Twitter. The best part is, it’s completely free!

How to Use TweetDeck
TweetDeck acts both as a substitute and extension of Twitter: you can tweet, retweet, reply, like tweets, send messages and follow and unfollow users, the same way you would do on the original platform. Before learning the most advanced tools, let’s learn how to navigate the essential tools on TweetDeck.
Getting started with Tweetdeck
-
Step 1

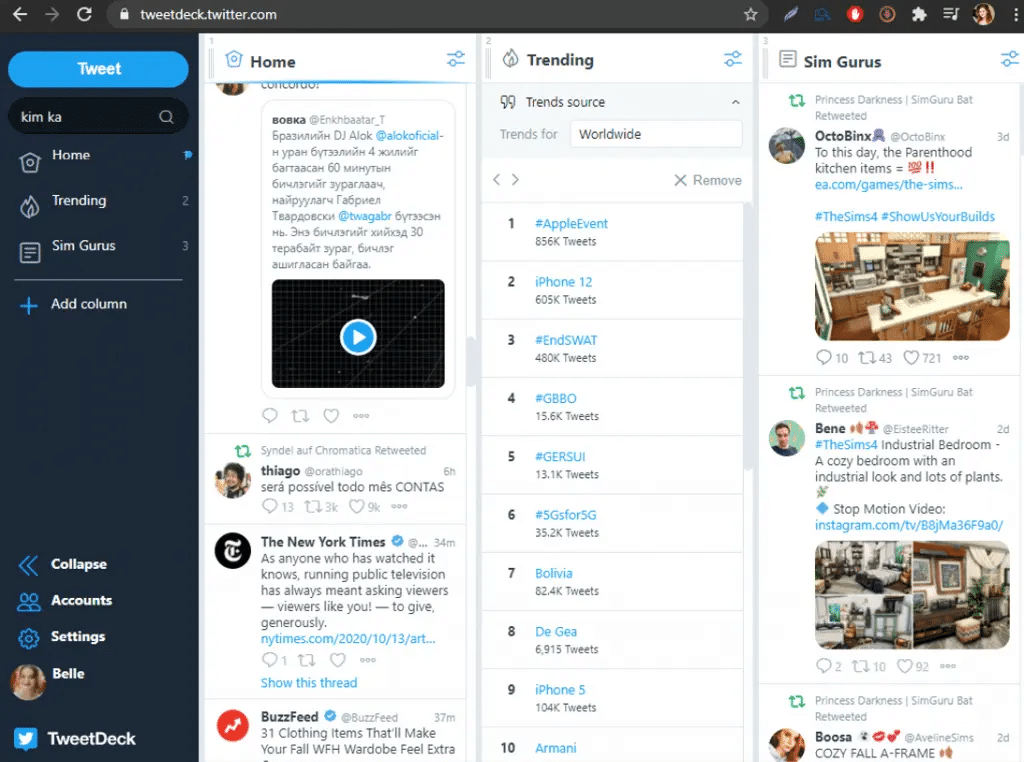
Visit TweetDeck on your browser and log in using your Twitter credentials.

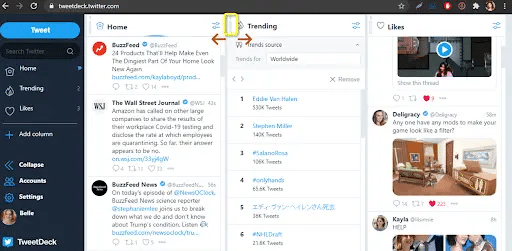
Your dashboard should look a little like this.
-
Step 2
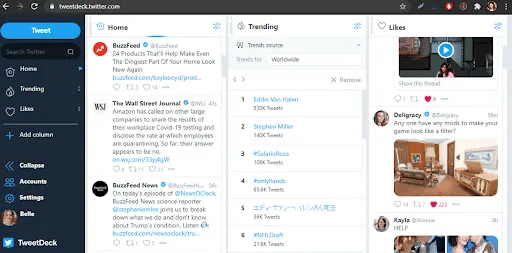
To show and hide your navigation menu, type X on your keyboard or click the arrows sign on the side-bar. You will notice there are a default set of four columns already set for you, including:
- Home: the usual Twitter feed you see on the Twitter website or app, showing tweets, replies, and retweets from users you follow.
- Notifications: this column card shows the interactions that are typically under the “Notifications” tab on Twitter, like new followers or mentions.
- Messages: here you’ll see your Direct Messages folder. To open a conversation, double-click a message on this column.
- Activity: in this column, you can see all activity performed by the profiles you follow, such as liking tweets, adding something to a list of following a new account.
We will now learn how to customize the column cards on your dashboard.
ADDING NEW COLUMNS
-
Step 1

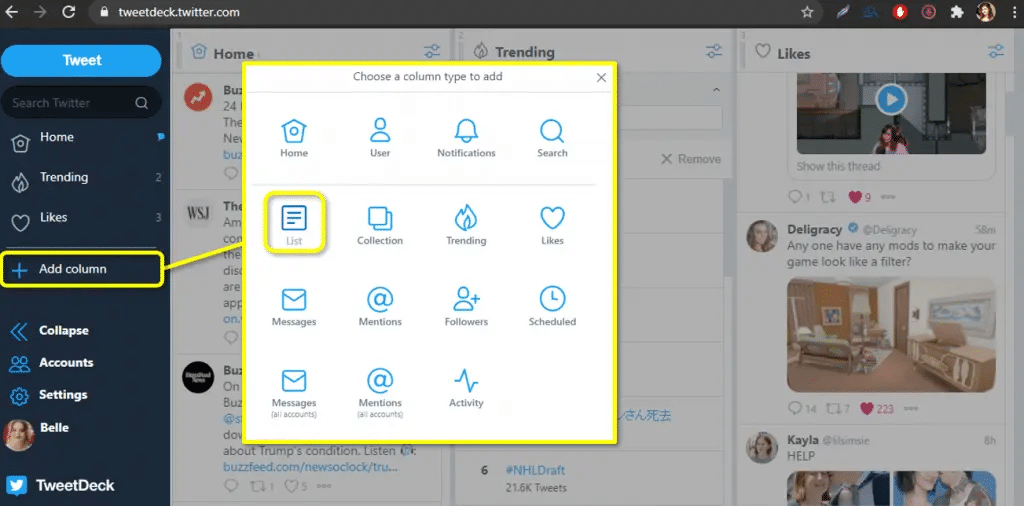
Adding columns is easy. To do that, click the “Add column” option on the side-bar or tap A on your keyboard.
-
Step 2

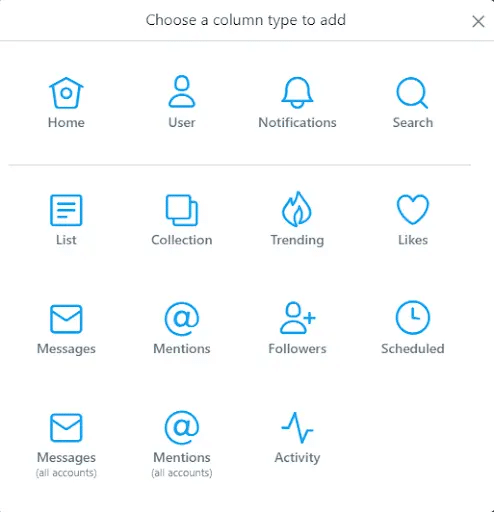
Select a type of column to add to your dashboard. Other than the four card types you already learned about, you can choose to display:
- User: displays tweets from any Twitter account selected.
- Search: creates a new search column for a word, phrase or hashtag. The results for the content will be continually updated while the column card is displayed.
- List: Displays a Twitter list that you created using Twitter, or creates a new list.
- Collection: You can put together lists of tweets to share with the world.
- Trending: Shows a list of hashtags or words that are popular at the moment. Can be personalized to display hashtags by location.
- Likes: displays all tweets an account liked on Twitter. Simply enter a name or Twitter handle to pick an account and start tracking their likes.
- Mentions: Similar to the Notification card, but only displays Tweets that include a chosen Twitter handle (@username).
- Followers: Shows what accounts started following you on Twitter.
- Scheduled: Displays tweets you scheduled that are awaiting the time to be sent. Scheduled tweets will disappear from this column after published.
- Messages (all accounts): similar to the regular Messages tab, but displaying conversations of all the accounts you’re managing on TweetDeck
- Mentions (all accounts): displays mentions to every account you manage on TweetDeck.
-
Step 3

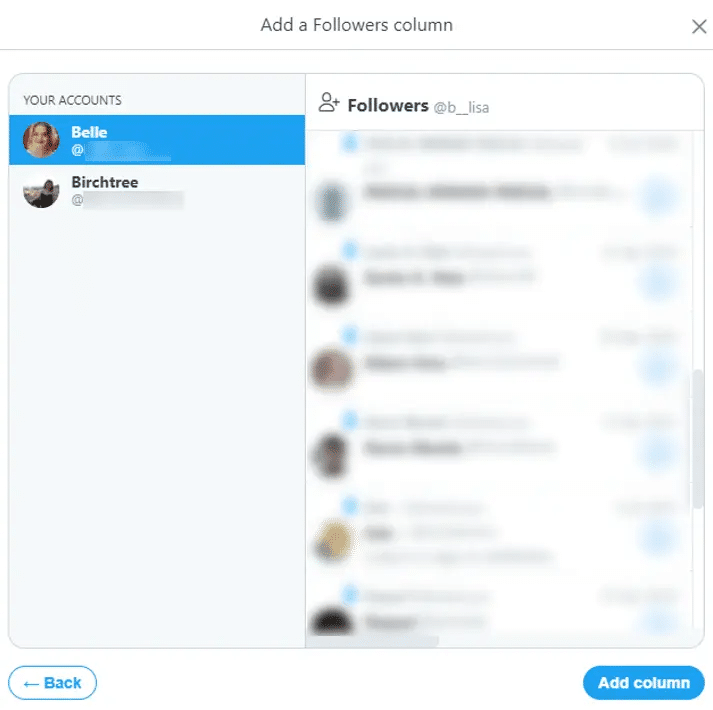
If you’re managing more than one account on TweetDeck, pick the user you want to display the information about. Click the “Add column” option when you are done! The new card will be displayed on your dashboard. Press 0 on your keyboard or scroll to the side to see it.

Customizing your Dashboard
Changing column position: every new column you add will be displayed at the end of the line, on the left of your dashboard. To change the order of the content, click the three-lines on the top-left corner of a column and drag it left or right to change the position of the card.
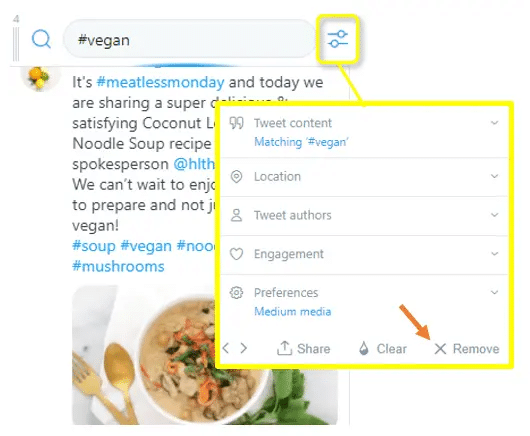
Deleting columns: to delete a card from your dashboard, click the “Settings” icon on the top-right corner of a column. Click “Remove” once the settings options are shown.
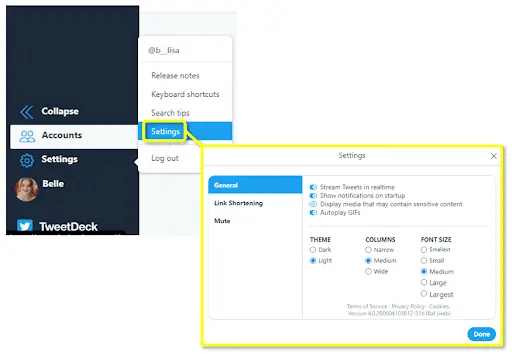
Changing your Dashboard look: to change your column and font size or background colors on Tweetdeck, click “Settings” on the bottom-left of the screen, then click “Settings” on the floating menu.
Pick your Theme or settings and click “Done” to confirm the changes.
Posting Tweets on Tweetdeck
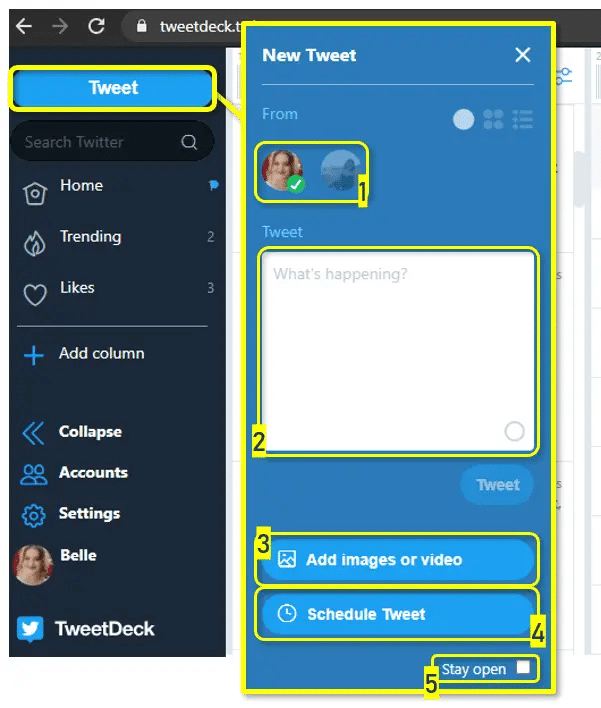
Tweeting with TweetDeck is just as easy as on Twitter. To get started, click “Tweet” on the side-bar or tap N on your keyboard and a new tab should pop-up, just like the image below.
-
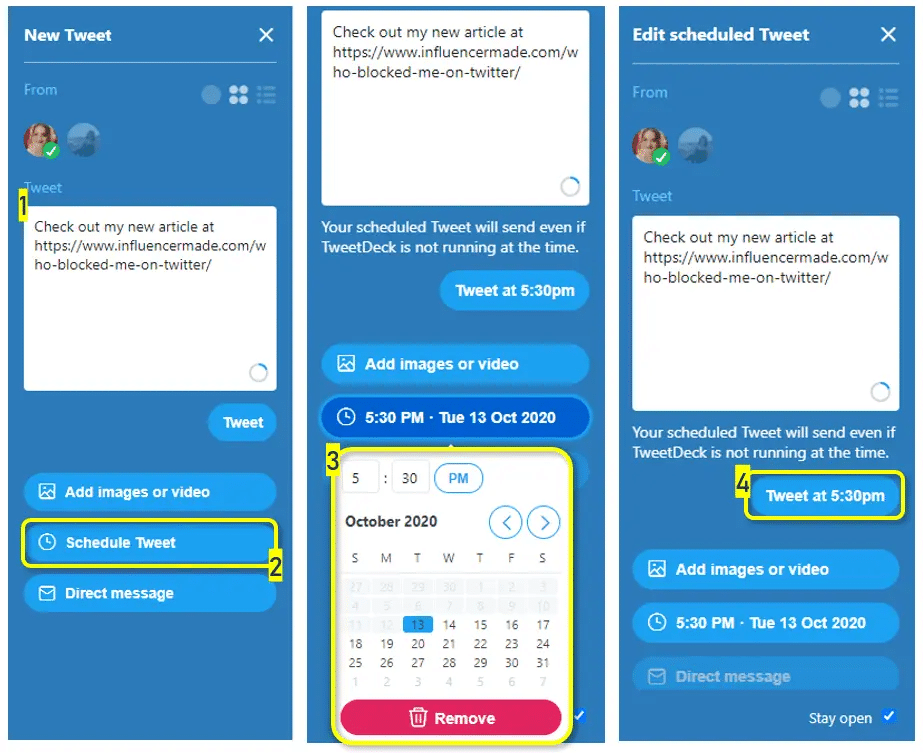
Step 1

Choose the account you want to tweet from (1). Now, type in your tweet in the text box (2). The round indicator on the bottom of the box will indicate how much text you have left on your 280 character limit.
-
Step 2
To add media to your tweet, click the “Add images or video” button (3) and browse through your computer to upload a file.
-
Step 3
The “Schedule Tweet” button (4) let you write a tweet ahead of time to publish whenever you want.
-
Step 4
When your tweet is ready, click “Tweet” under the text box.
-
Step 5
If you want to keep your Tweeting tab open after you tweet, make sure to check the “Stay open” option (5) at the bottom of the tab, so you don’t need to open it every time you want to post something.
Sending DMs on TweetDeck
There are three ways to send Direct Messages on TweetDeck, and they are all easy! Once you get the hang of it, you won’t even notice the difference from the Twitter website.
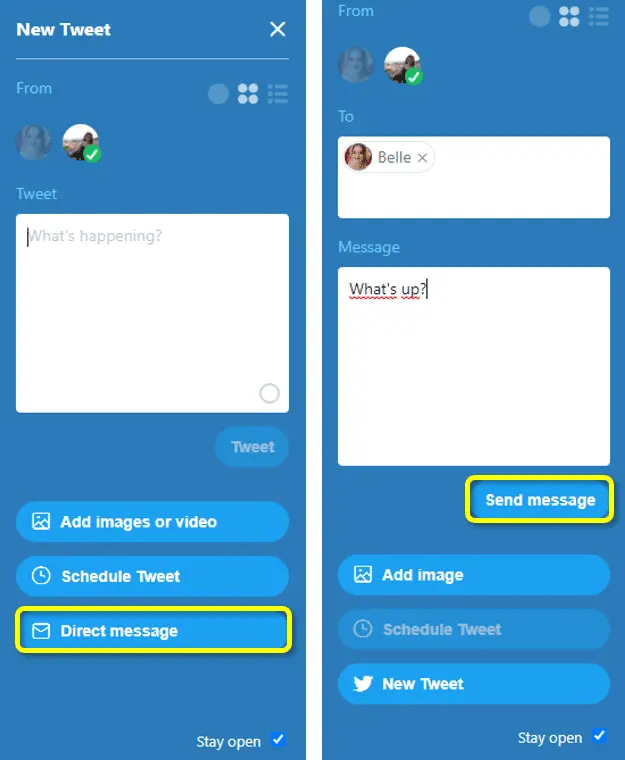
From your sidebar: click “Tweet” on the side-bar, just as you would when tweeting. When the new tab opens, scroll down and click “Direct Message”. Alternatively, press D on your keyboard to open this tab. In the “To” field, type in who you want to message (you can choose as many people as you want). After writing your message on the “Message” field, just click “Send message” and you’re done!
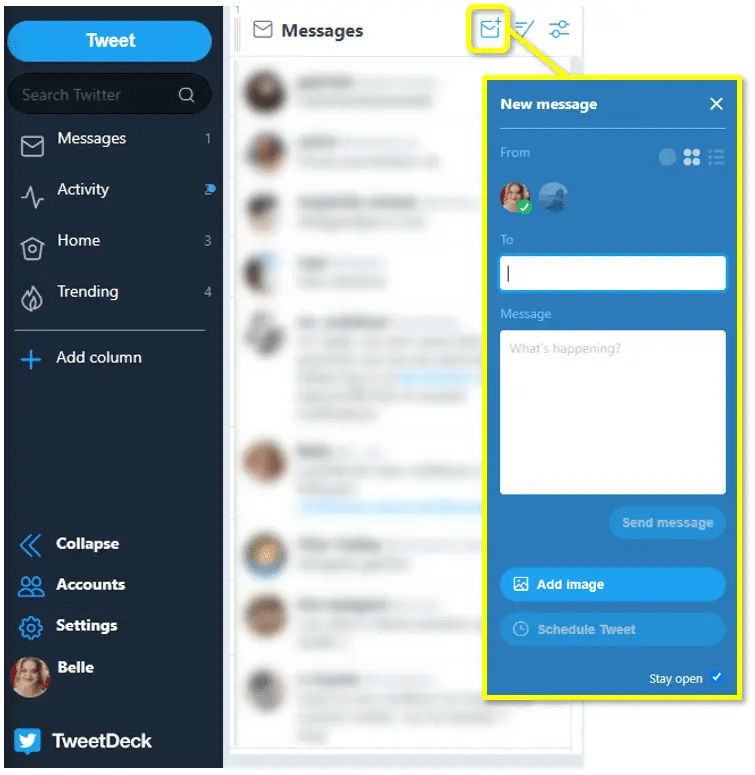
From a message column: The message column shows all of your Twitter conversations. To send a new Direct Message click the envelope icon on the top-right corner of the column.
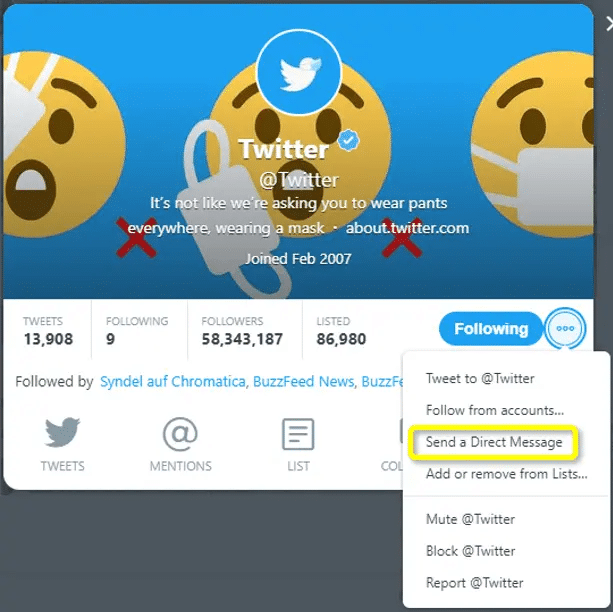
From a Twitter profile: To send a DM directly from someone’s profile, click a person’s name or profile picture. Once their profile pops up, click the three dots next to the “Following” button. Pick “Send a Direct Message” and the New message tab will open, with the “To” field already filled.
TweetDeck Shortcuts
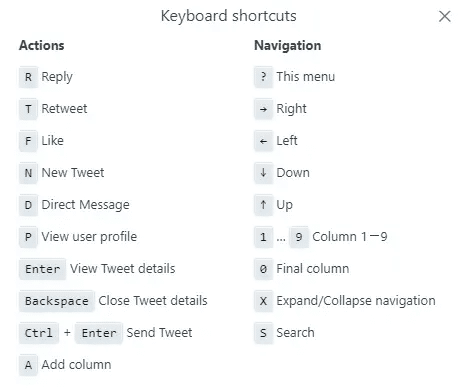
These keyboard shortcuts can be used from anywhere in TweetDeck and make navigating easier. Use the number keys 1-9 to navigate through columns (0 to jump to the last one) and the arrows to go up and down the tweets.

Advanced Tools for TweetDeck
Now that you mastered the basics of TweetDeck and your account is up and running, let’s learn how to use the tools that will make you a Twitter pro!
How to Schedule Tweets on TweetDeck
Scheduling tweets allow you to plan your posts ahead of time and have your account active even when you’re taking a break from the platform. The process is just as easy as tweeting, check out the step by step:
-
Step 1

Type N on your keyboard or click the “Tweet” button to open the New Tweet tab.
-
Step 2
Type in your text at the “Tweet” section, add images or videos if you want.
-
Step 3
When your tweet is finished, click “Schedule Tweet” just below the text box.
-
Step 4
Pick a date and time for your tweet to be published. Note that you can plan days, weeks, or even years in advance!
-
Step 5
After you chose your date, click back at the text box to close the calendar and click “Tweet at” to schedule your post. The tweet will be published even if you’re not online and TweetDeck is not open on your computer.
How to Delete a Scheduled Tweet
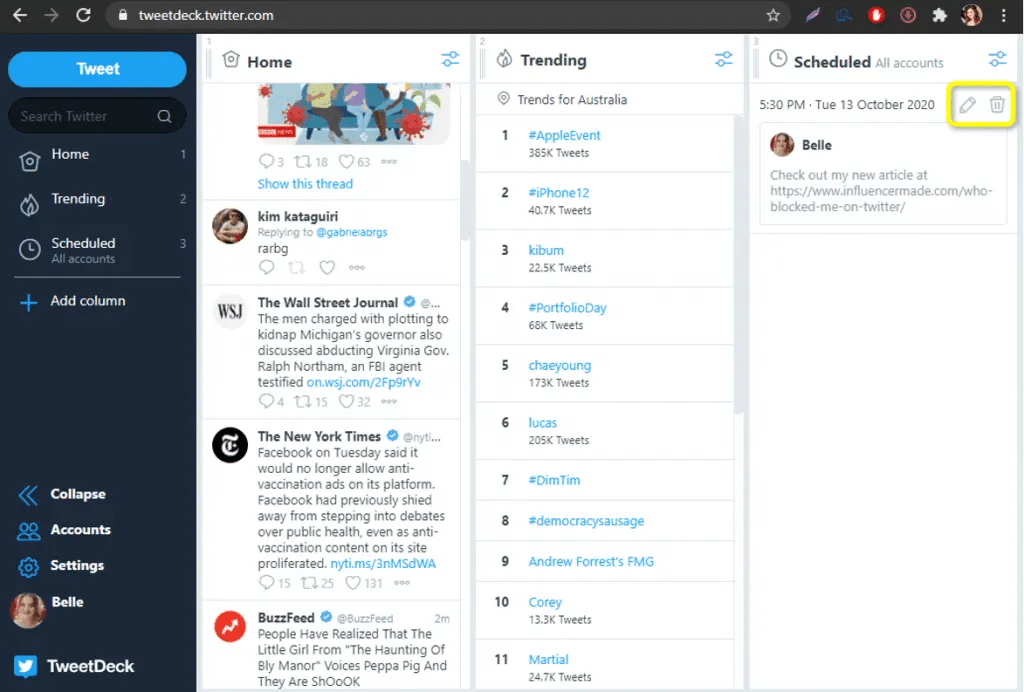
Deleting a scheduled tweet: all scheduled tweets will be under the “Scheduled” column. To delete them, click the trashcan icon above the desired tweet and confirm the action. If you want to edit a scheduled tweet, go to click the pencil above it to open the Edit tab.
How to Create a Collection with TweetDeck
A Twitter Collection is a selection of tweets curated by a user. When creating collections, tweets can be organized according to topics, events or interests, in any particular order. Tweet collections have their own URL and can be shared or embedded on websites and apps.
Create a Twitter Collection
-
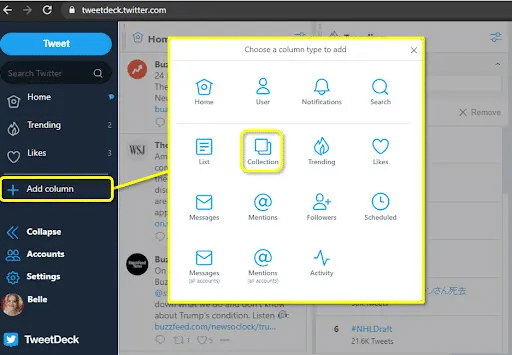
Step 1

Click the “Add Column” on the side-bar and choose “Collection” from the column types available.
-
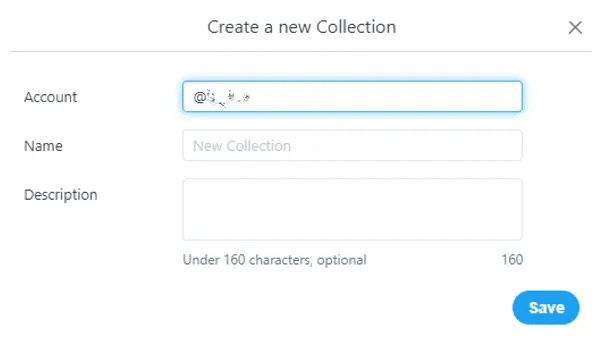
Step 2

Choose which account you want to publish the Collection from. Add a name for your Collection and a description (optional), save when you’re done. A new column with your Collection should appear on your TweetDeck dashboard.
-
Step 3

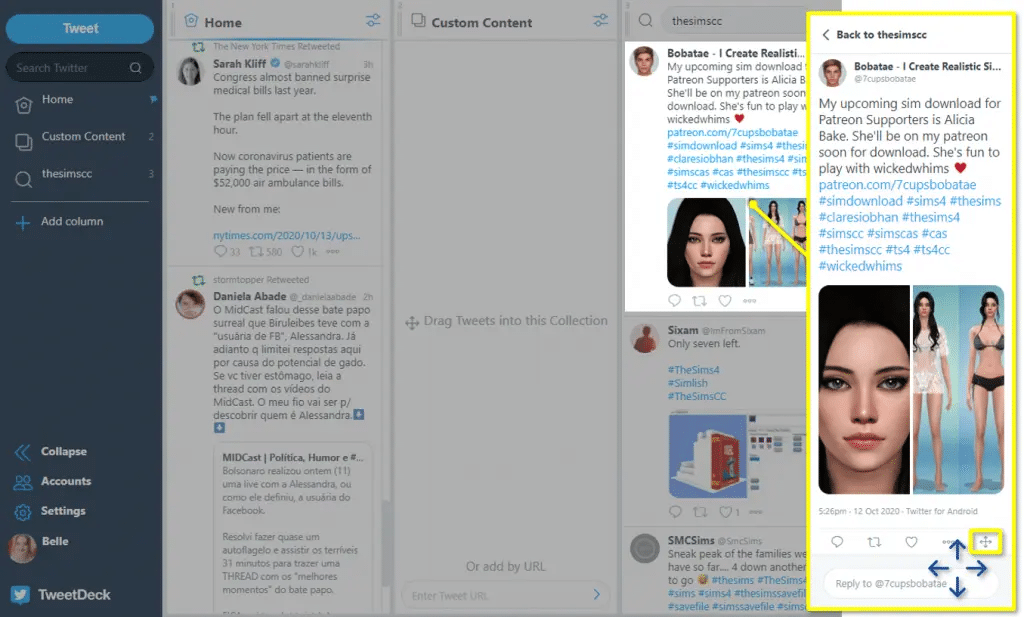
To add new tweets to your collection, find a tweet, and click the body text to open it.
-
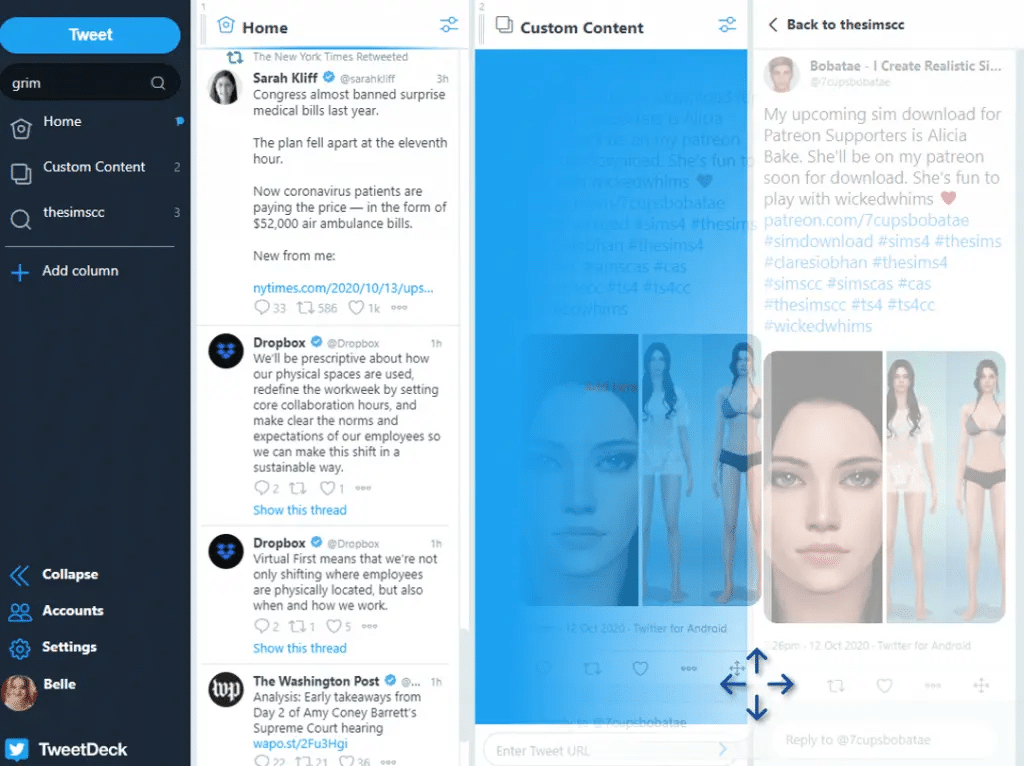
Step 4

Using the move icon on the bottom-right of the tweet, click and drag the tweet to the Collection column to add it. Alternatively, you can click the three dots on the bottom of the tweet and click “copy link to this tweet” and paste the URL on the Collection column to add it.
-
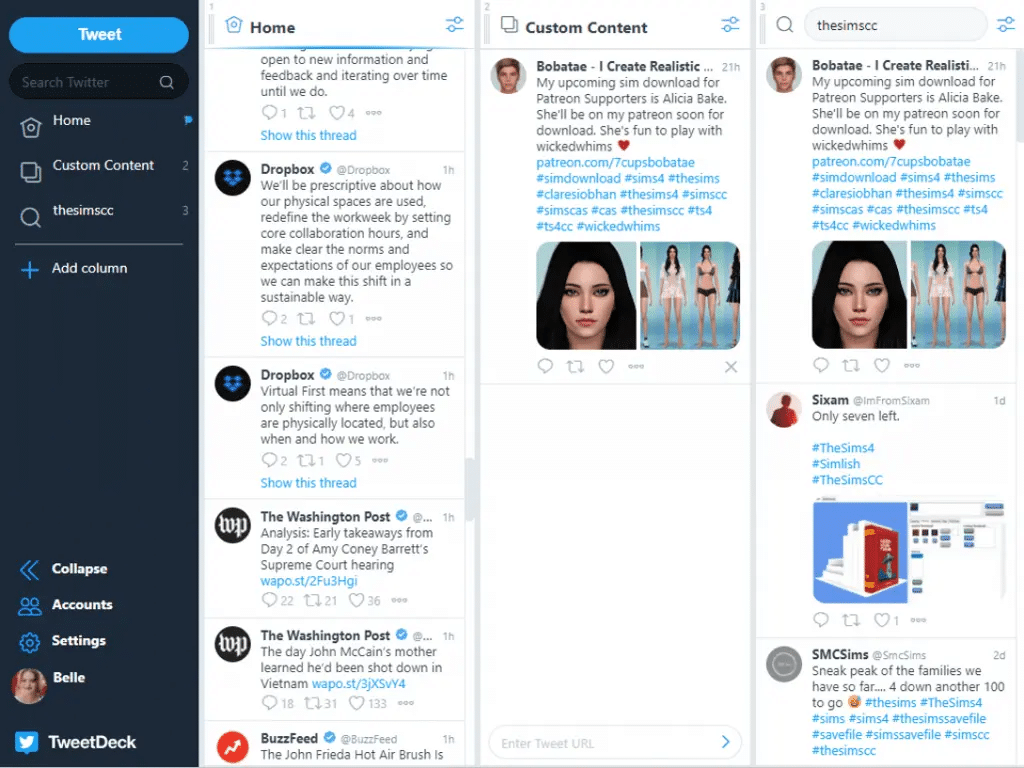
Step 5

Now your collection has its first tweet! To add more, repeat the process as many times as you want.
Embed a Twitter Collection
Embedding is a way to share Twitter content outside of the platform, in blogs or social media.
-
Step 1

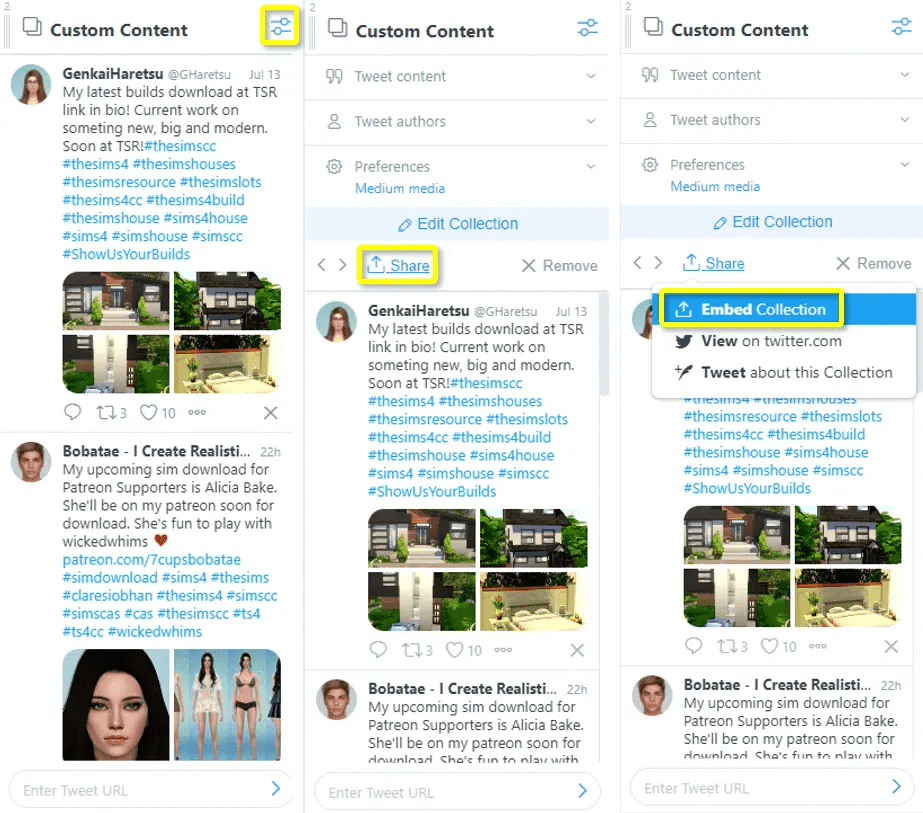
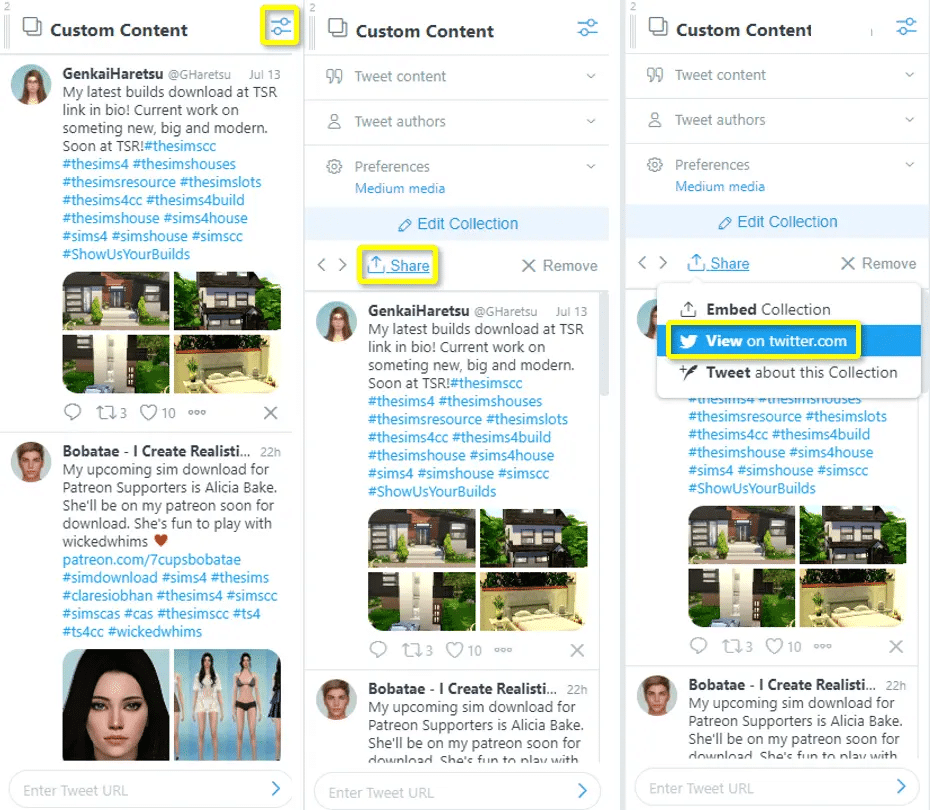
On the Collection column, click the Setting button in the upper-right corner. Next, on the settings tab, click “Share” and choose “Embed collection”.
-
Step 2

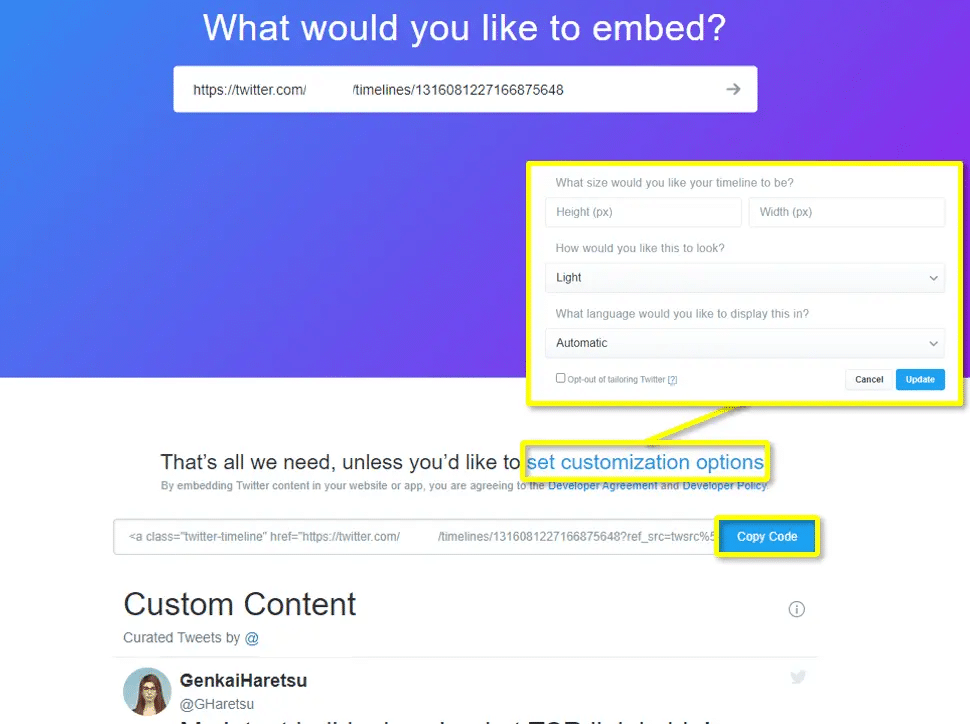
You will be redirected to a page on Twitter Publish. Here, you can customize how your embed grid will appear and language settings for your Collection. When you are done, copy the code and paste it in the website of your choosing, where you want the Collection to be.
Share a Twitter Collection Link
An alternate way to share your Collection is to give out the link, in or out of Twitter. To view your Collection on Twitter and copy its link, follow these steps:
-
Step 1

In the settings menu of your Collection column, choose “View on twitter.com.”
-
Step 2

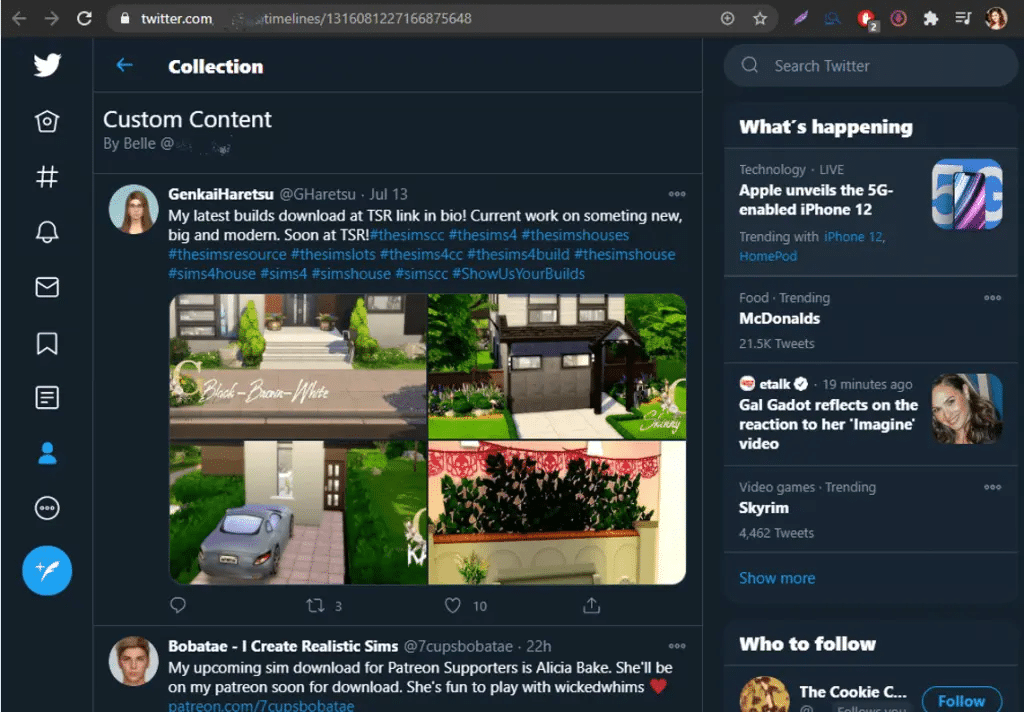
You’ll be directed to the Collection’s page on Twitter. Here, you can view all the tweets on the Collection and copy the URL from the address bar. Now, you can post the URL wherever you want for people to access.
Note: Even if your profile is protected, your Collections will still be public. Private tweets can not be added to Collections.
Tweet a Collection
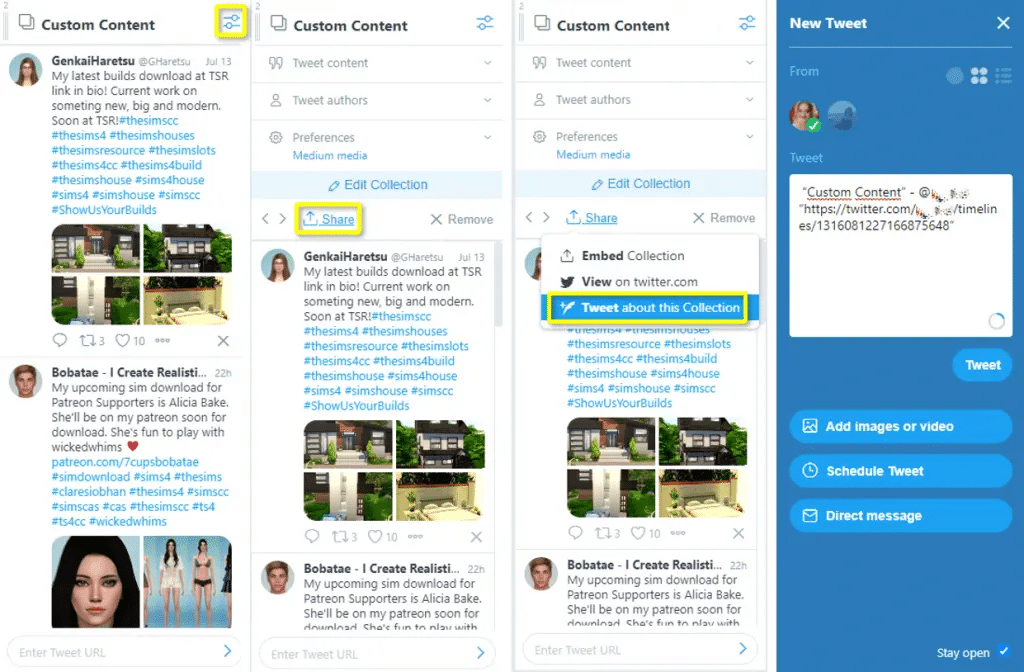
To share a Collection by tweeting, you can either copy and paste the Collection’s URL or just click “Tweet about this Collection” on the share options. The New Tweet tab will appear already with your link. Edit the text as you wish before publishing!
Delete a Twitter Collection
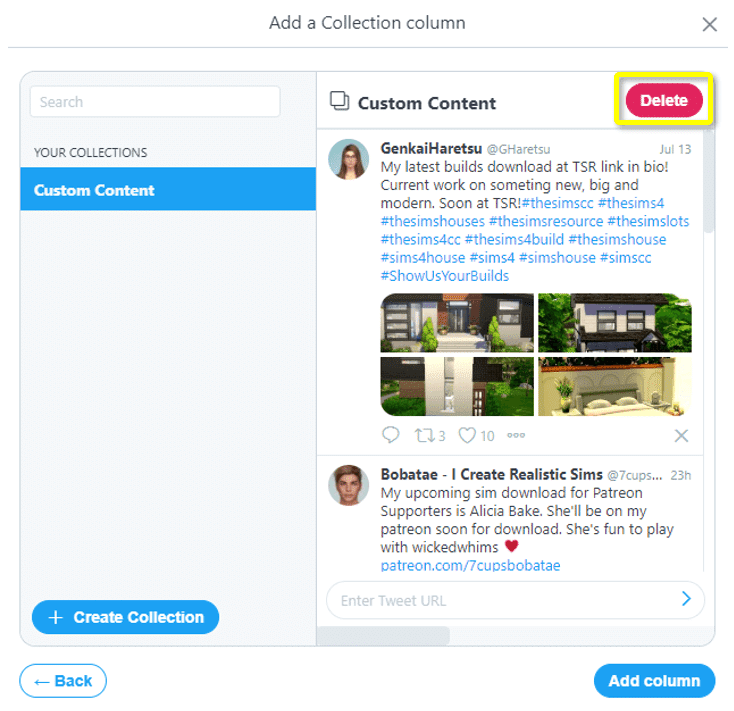
To delete a Twitter Collection, click the “Add Column” button in the side-bar of your dashboard. Choose the Collection you want from your collections and click “Delete”, on the upper-right corner of the window.
How to Create a List on TweetDeck
Twitter Lists are a curated selection of Twitter accounts that can help you organize your Twitter flow and not miss out on important topics. Lists display tweets only by the selected accounts, in a sort of “parallel” Twitter feed. You can create your own Lists or follow Lists created by other users to keep up with your interests.
When using TweetDeck, each list can be shown separately in your Dashboard, in a way that you can track multiple topics at the same time. Let’s learn how to make a list:
-
Step 1

Click “Add column” in your side-bar and choose “List” to open all of your Twitter Lists.
-
Step 2

Here, you’ll see both Lists that you created and Lists you’re following by other users. To create a new one, click “Create List”. You can create up to 1000 Lists!
-
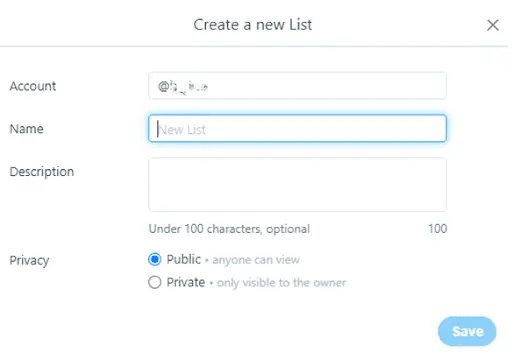
Step 3

Pick which account you want to create the list from, then write a name and an optional description. Here, you can also choose to create a public or private list. Public lists are great for tracking your interests, news, work, or friend groups and events. You should consider making a private list for more sensitive subjects, like tracking your consumers, audience, or competitors.
-
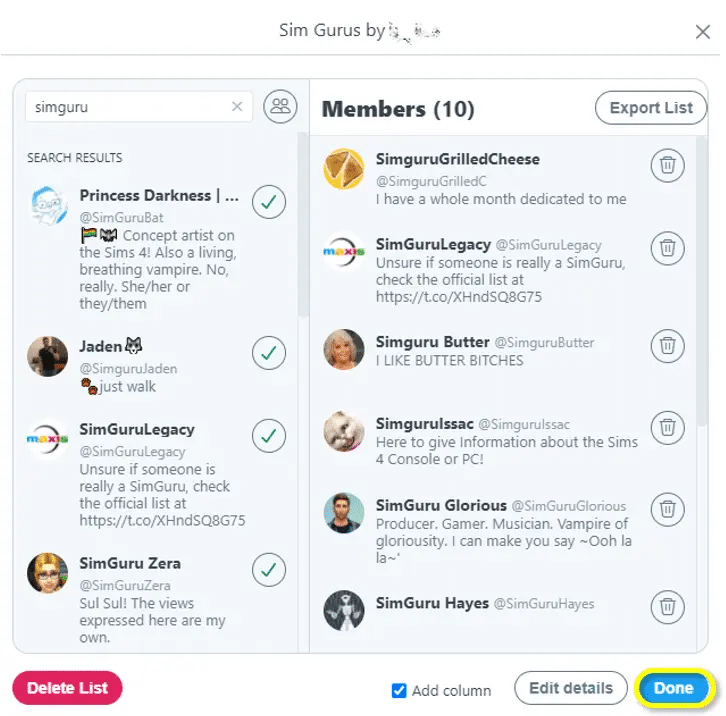
Step 4

Now add accounts to your list, you can find them by the Twitter @ handle or by their display name. Check my article How to Change Your Twitter Handle to learn the differences between Twitter handles and display names. You can include up to 5000 accounts on your list! When you’re finished, click “Done” to save your list.
-
Step 5

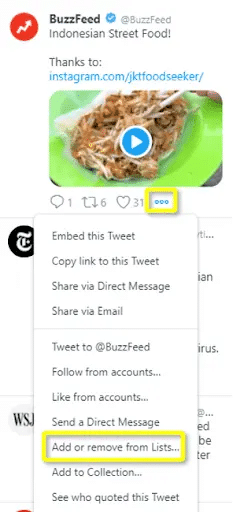
Another way to include people to a list is to click the three dots at one of their tweets or their profile and choose “Add or remove from Lists.”
-
Step 6

Every new list will be displayed at the end of your dashboard. There, you can see the tweets from everyone on the list. To edit the list, click the Settings button on the upper-right corner of the column.

To view all of your Lists, go back to the “Add column” button on the side-bar and click Lists to display all of them. Here, you can also delete any of your lists.
Tip: To keep track of a single user on your TweetDeck dashboard, add a “User” column with their profile or make a private list with only them in it.
How to Mute a Twitter Account With Tweetdeck
Muting is a discrete way of removing someone from your timeline without blocking or unfollowing them. To mute someone using TweetDeck is just as easy as with Twitter itself. Check how to do it:
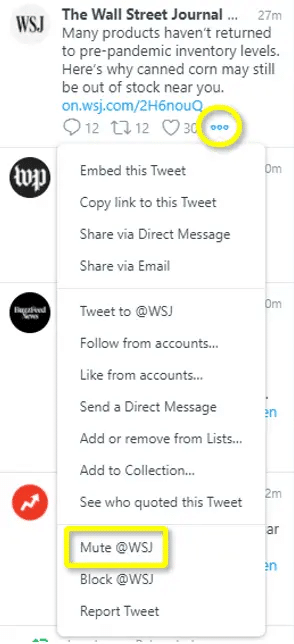
Muting from a Tweet: when you stumble across a tweet from someone you wish to block, click the three dots at the bottom of the tweet and select “Mute @user”. Now you won’t see their tweets on your feed anymore. You will still receive DM and mention notifications from a muted person if you follow them.

Muting from a profile: in the profile, you wish to mute, click the three dots icon and select “Mute” from the options listed.
Unmuting: To unmute someone, go to their profile and follow the same steps as above, choosing “Unmute @user” at their profile.
To view a list of everyone you muted, visit this page on Twitter.
Note: There used to be ways to find out if you have been muted using TweetDeck. However, Twitter has removed this option from the platform.

Account Management
Managing Multiple Accounts
If you have more than one account, managing social media can be tricky. With TweetDeck, you don’t need to open multiple browsers to log into all of your Twitter accounts and you can run all of your profiles from the same page.
-
Step 1

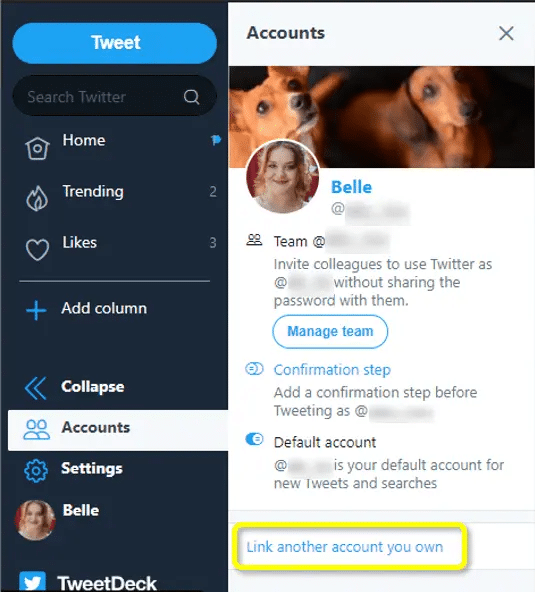
Press X on your keyboard to expand your side-bar and go to the “Accounts” menu. There, click “Link another account you own.”
-
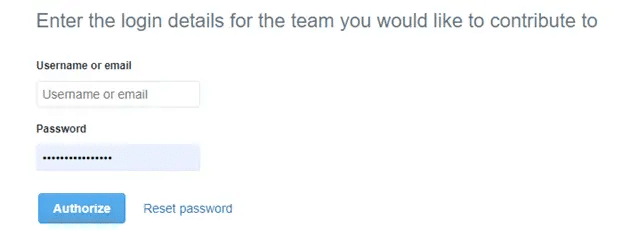
Step 2

Log in to your second Twitter account and authorize, you might be redirected to the Twitter website for confirmation.
-
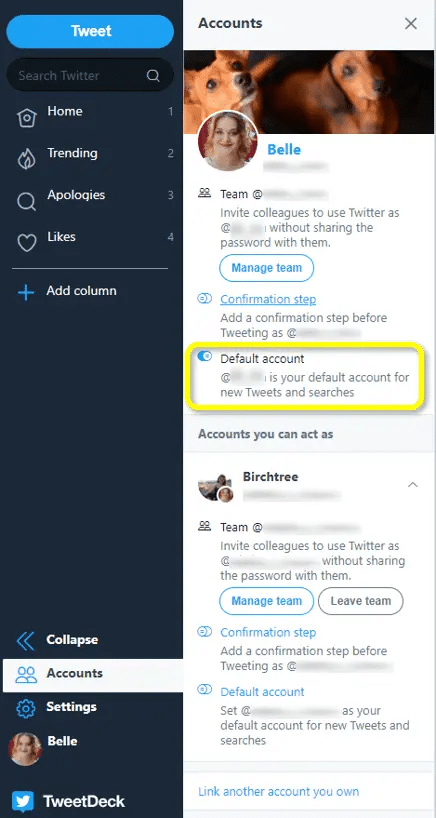
Step 3

After confirming, any account you added will be displayed in the Accounts menu. There, you can choose which one is your default account. When tweeting, direct messaging, and following, the default account will be automatically selected, and the option to choose secondary accounts for the action will be available.
Sharing your Account with a Team
If you share your brand with a team, Tweetdeck is your ally for making account-sharing no hard deed. As the owner of a Twitter account, you can invite other accounts to act as admins or contributors to your account, check the differences between each one:
Owner:
- Can manage passwords, phone number, and login settings;
- Can invite others to access the account (admins and contributors);
- Can take actions such as tweet, retweet, send DMs, schedule tweets, create lists, and collections.
Admin:
- Can invite others to access the account (admins and contributors);
- Can take actions such as tweet, retweet, send DMs, schedule tweets, create lists, and collections.
Contributor:
- Can take actions such as tweet, retweet, send DMs, schedule tweets, create lists, and collections.
-
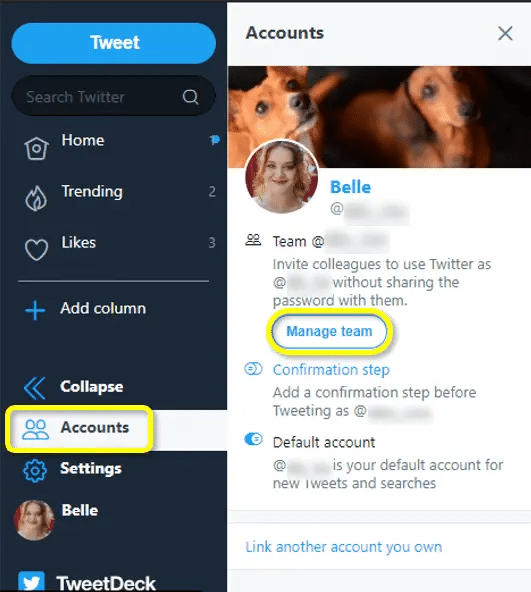
Step 1

To start adding to your team, go to the account tab in your side-bar, and click “Manage team.”
-
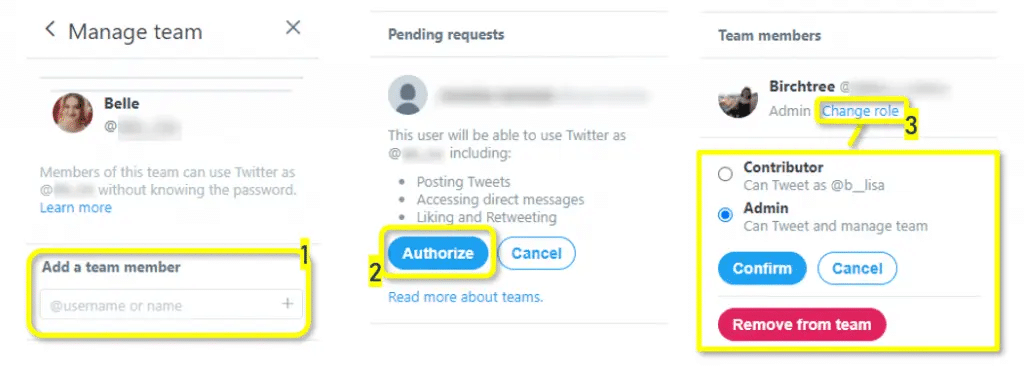
Step 2

Add the username of the people you wish to authorize access to the main account (1). Note that invited users do not need to know your password. Authorize (2) the user to add them as admins. To change an admin user into a contributor, or remove them from the account, go back to manage teams and click “Change role” under their username (3).
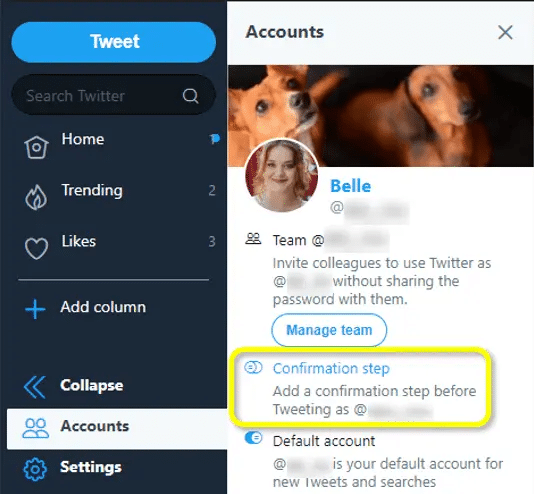
Adding a Confirmation Step to Your Posts
To prevent tweeting something by accident or to make sure you review every tweet or DM before posting, you can add an extra confirmation step before tweeting. Check it out:
-
Step 1

In the accounts settings on the side-bar, click to enable “Confirmation Step.”
-
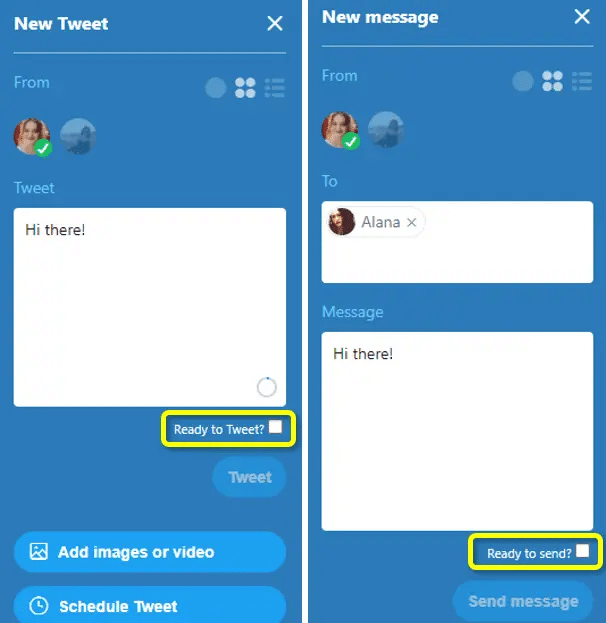
Step 2

Now, when tweeting or DMing, there will be a small checkbox under your text, just like the image below. Make sure to click it to enable sending tweets or messages on TweetDeck.

Advanced Searching Tools
Tweetdeck offers an advanced search engine that can help you track your audience, competitors, and relevant topics the best way possible. You can search for hashtags, words, phrases, locations, or usernames.
To start searching on TweetDeck, follow these steps:
-
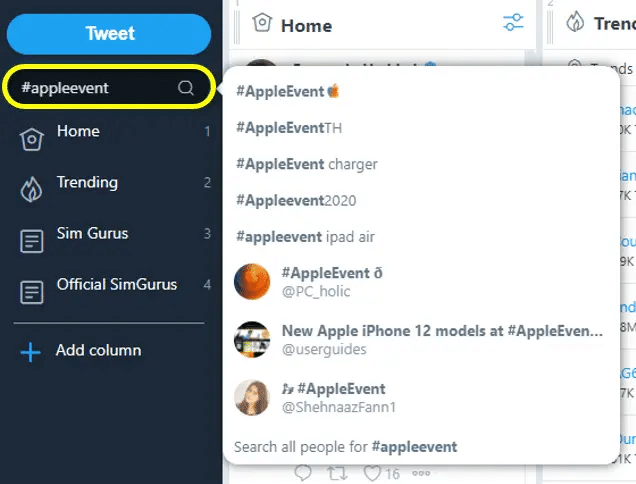
Step 1

Search for a hashtag, word, phrase or username using the magnifying glass icon on the side-bar of your TweetDeck dashboard.
-
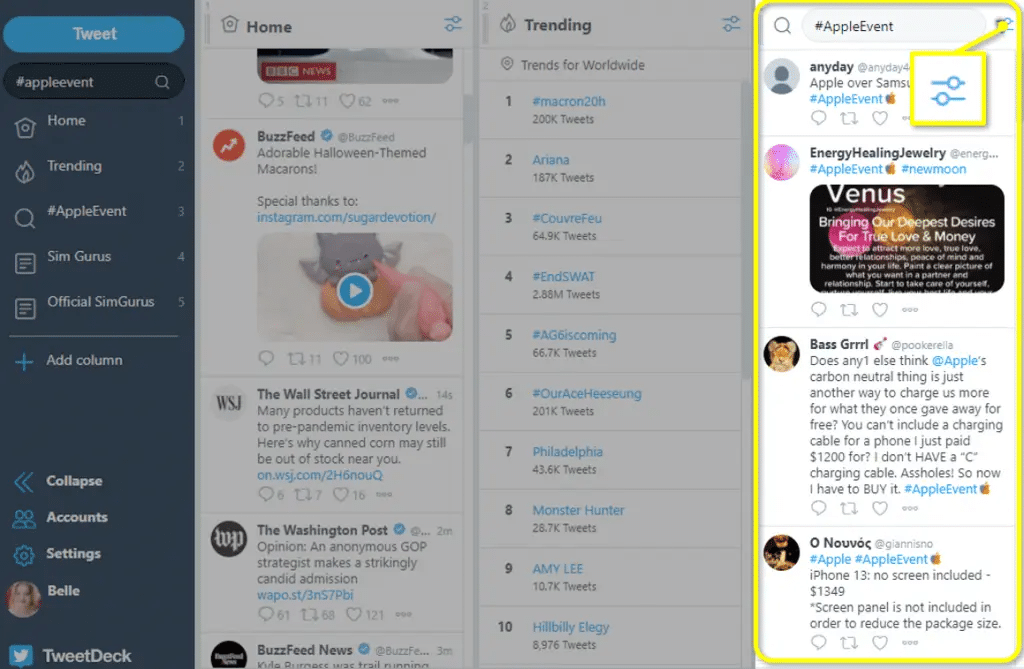
Step 2

The tweets containing the content you searched will be shown in a new column at the end of your dashboard. By clicking the settings button at the top of the column, you can display results by content type, location, authors, and engagement.
-
Step 3
you can further personalize your results by using advanced search queries. Type your subject followed by one of the following filters to narrow down your results:
Setting Desktop Alerts
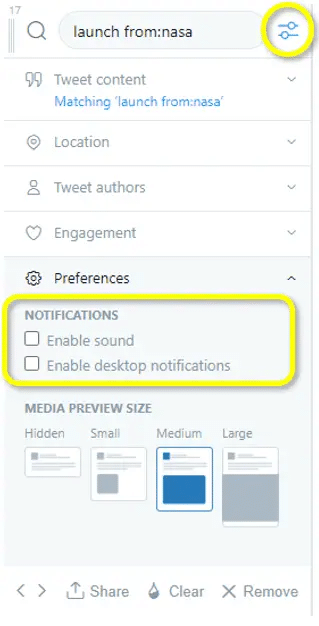
To keep up with topics that matter a lot to you, use Desktop Alerts to make sure you don’t miss out. Set alerts by clicking the settings button on a column and checking the box for “Enable desktop notifications”.